ai-edge-model-explorer-visualizer
v0.1.2TypeScript
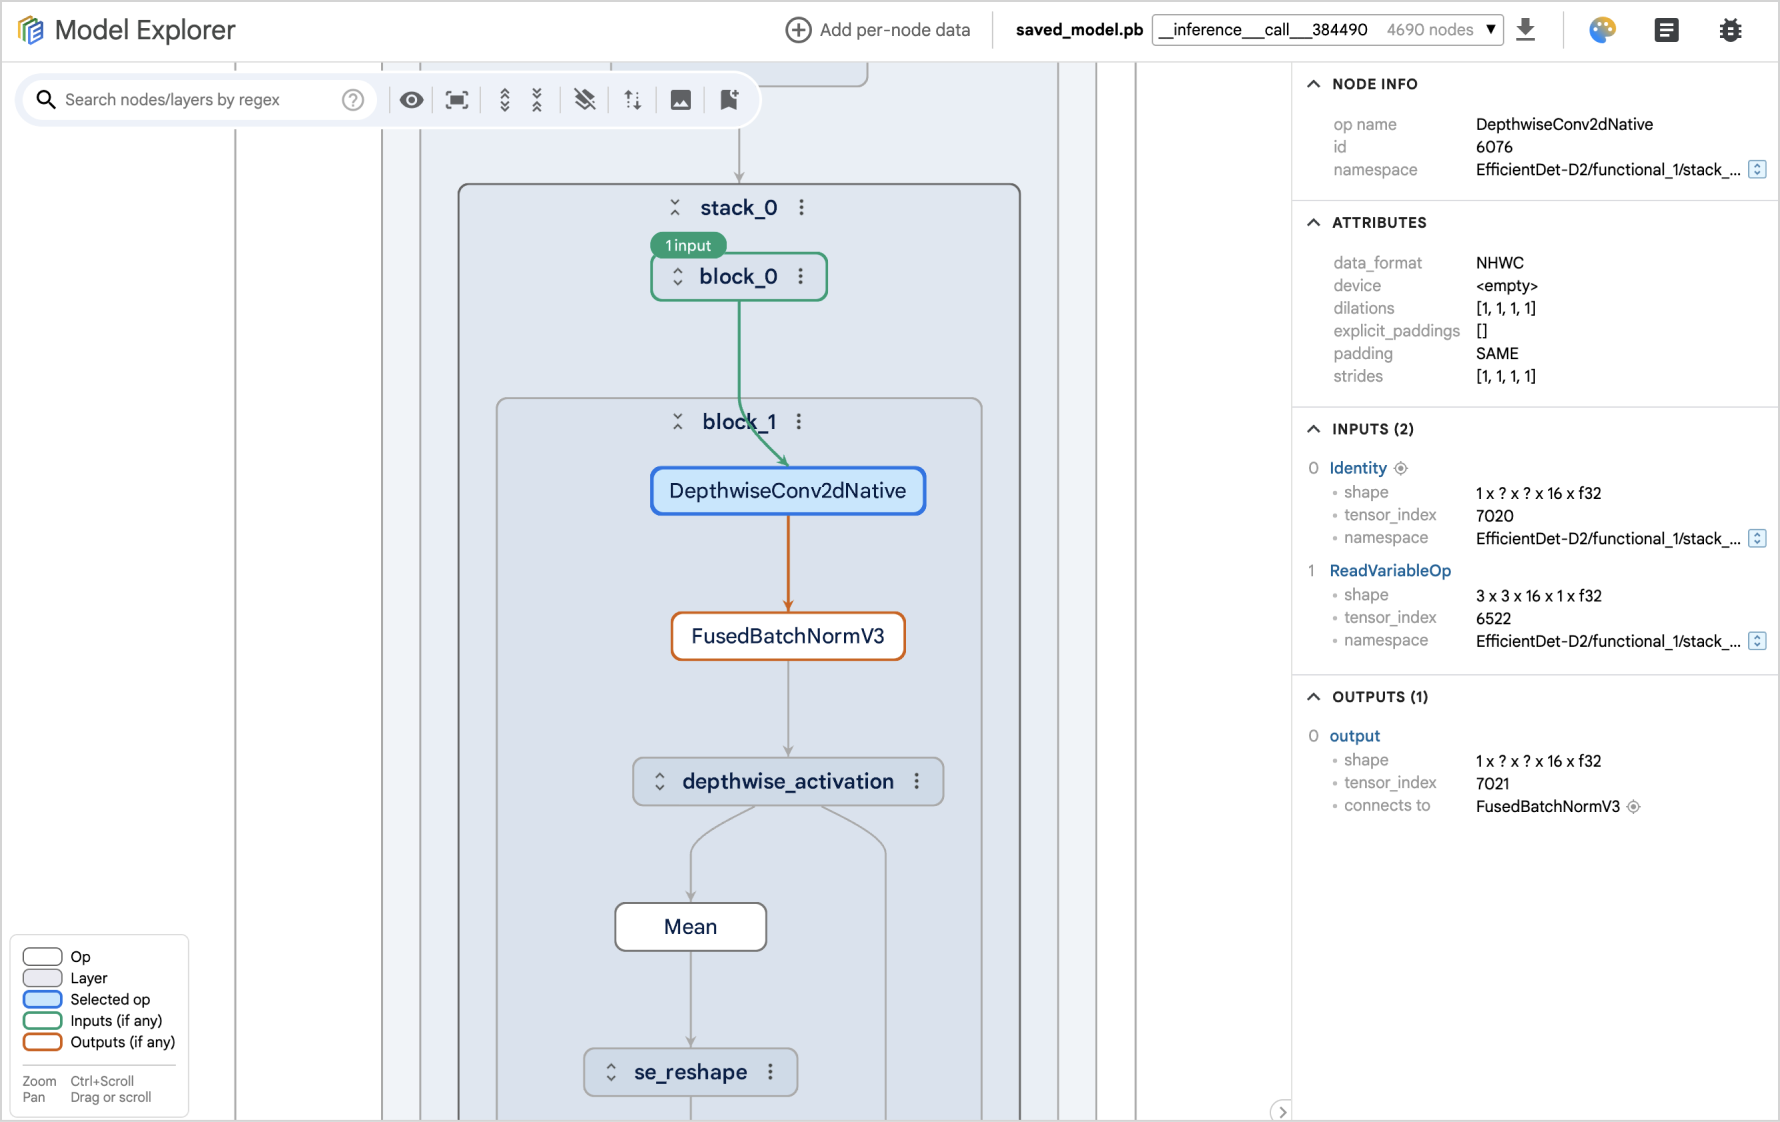
A WebGL based high performance graph visualizer, brought to you by AI Edge Model Explorer.
4.7K/weekUpdated 7 months agoApache-2.0Unpacked: 7.1 MB
Published by Google Inc.
npm install ai-edge-model-explorer-visualizerOverview
This npm package provides the core visualizer UI from Model Explorer as a reusable custom element
- Takes a JSON input graph, performs layout calculations in a web worker, and uses WebGL for high performance rendering.
- Allows easy customizations for various UI elements and behaviors, such as hiding certain nodes, setting node styles, restoring UI states, etc.
- Provides APIs to interact with the UI, such as adding custom node data, emit events for various UI actions such as node selected, hovered, etc.
See how it works in our demos, implemented in vanilla JS, vanilla TS, Next.js/React, and Angular.
Usage
1. Import the package.
- Option 1: through the script tag:
``html`
- Option 2: add dependency in package.json and import it as a module in script:
`javascript`
# In package.json
{
...
dependencies: {
"ai-edge-model-explorer-visualizer": "*"
}
}
javascript`
import 'ai-edge-model-explorer-visualizer';
1. Serve the file and the static_files directory.worker.js
To ensure the Model Explorer Visualizer functions correctly, you need to serve the file and the static_files directory alongside your main application.dist/worker.js
Steps:
1. Download the package (e.g. from jsdelivr) and extract the file and the dist/static_files directory and its content.index.html
1. Place them in the same directory as your file. Your directory structure should look like the following:`
     - index.html
     - worker.js
     - static_files/
     - ...
   Purpose of files

- : This file handles computationally intensive tasks, such as layout calculations, within a web worker.static_files/
- : This directory contains essential font textures and styles required for rendering the visualizer correctly.
Customizing file locations (Advanced)
By default, the visualizer expects worker.js and static_files to be served from the same location as your application's index.html file. If you need to serve these files from different locations, you can configure the following properties in your script:`
javascriptmodelExplorer
// is a global object exported to window.
// Set base URL for the static_files directory.worker.js
//
// Can be a relative or absolute path on your server, or a URL to another server.
// If using a different origin, ensure CORS is correctly configured.
modelExplorer.assetFilesBaseUrl = 'https://unpkg.com/my-me@latest/dist/static_files';
// Set full path to the file.`
//
// Typically a relative or absolute path on your server. Loading web workers from
// different origins is not supported.
modelExplorer.workerScriptPath = 'path/to/worker.js';
1. Create the custom element and feed it a collection of json graphs to visualize (see demos for examples).
`javascript`
const visualizer = document.createElement('model-explorer-visualizer');
visualizer.graphCollections = [...];
document.body.appendChild(visualizer);
API
Properties
The following properties should be set before adding the visualizer component to DOM.
- graphCollections:GraphCollection[]
An array of graph collections to be visualized. Each collection represents a group of related graphs.
- config:VisualizerConfig
Configuration object for the visualizer, allowing customization of its behavior and appearance. Refer to the VisualizerConfig interface definition for specific configuration options.
- initialUiState:VisualizerUiState
An object representing the initial UI state to restore when the visualizer is initialized. This can include selected nodes, expanded layers, and other UI-related settings. Refer to the VisualizerUiState interface definition for specific state properties.
- benchmark:boolean
Enables a special benchmark mode for performance testing. When set to true, the visualizer ignores all other input properties and allows you to specify the number of nodes and edges to render, along with an FPS counter.
Events
Events are emitted as Custom Events on the visualizer. You can listen to these events using addEventListener and access the event payload (if any) in the detail field.
Example:
`javascript`
visualizer.addEventListener('selectedNodeChanged', (e) => {
const customEvent = e as CustomEvent
console.log(customEvent.detail?.nodeId);
});
- titleClicked:CustomEvent
Triggered when the visualizer's title is clicked.
- uiStateChanged:CustomEvent<VisualizerUiState>
Triggered when the visualizer's UI state changes (e.g., selected node, expanded layers). The event payload is a VisualizerUiState object representing the current UI state. This can be used to restore the UI state on initialization using the initialUiState input property above.
- modelGraphProcessed:CustomEvent<ModelGraphProcessedEvent>
Triggered when the default graph has been processed.
- selectedNodeChanged:CustomEvent<NodeInfo>
Triggered when the selected node changes.
- hoveredNodeChanged:CustomEvent<NodeInfo>
Triggered when the hovered node changes.
- doubleClickedNodeChanged:CustomEvent<NodeInfo>
Triggered when a node is double-clicked.
Methods
- selectNode(nodeId, graphId, collectionLabel?, paneIndex?)
Selects the specified node, expanding all its parent layers.
- nodeId (string): The ID of the node to select.graphId
- (string): The ID of the graph containing the node.collectionLabel
- (string, optional): The label of the collection containing the node. If omitted, the method searches all collections in the input graphCollections.paneIndex
- (number, optional): The index of the pane (0 or 1) in which to select the node. Defaults to 0.
- addNodeDataProviderData(name, data, paneIndex?, clearExisting?)
Adds data for node data provider.
This only works after the model graph is processed. Call it when modelGraphProcessed event above is emitted.name
- (string): The name of the data to add.data
- (NodeDataProviderGraphData): The data to add.paneIndex
- (number, optional): The index of the pane to add data for. Defaults to 0.clearExisting
- (boolean, optional): Whether to clear existing data before adding new data. Defaults to false.
- addNodeDataProviderDataWithGraphIndex(name, data, paneIndex?, clearExisting?)
  Adds data to the node data provider, using graph indices.

This only works after the model graph is processed. Call it when event above is emitted.
- name (string): The name of the data to add.data
- (NodeDataProviderData): The data to add.paneIndex
- (number, optional): The index of the pane to add data for. Defaults to 0.clearExisting` (boolean, optional): Whether to clear existing data before adding new data. Defaults to false.
-