gatsby-wordpress-theme-phoenix
v3.0.0
Gatsby WordPress Theme Phoenix
68/weekUpdated 3 years agoMITUnpacked: 3.4 MB
Published by Imran Sayed
npm install gatsby-wordpress-theme-phoenix🎨 Gatsby WordPress themes
 
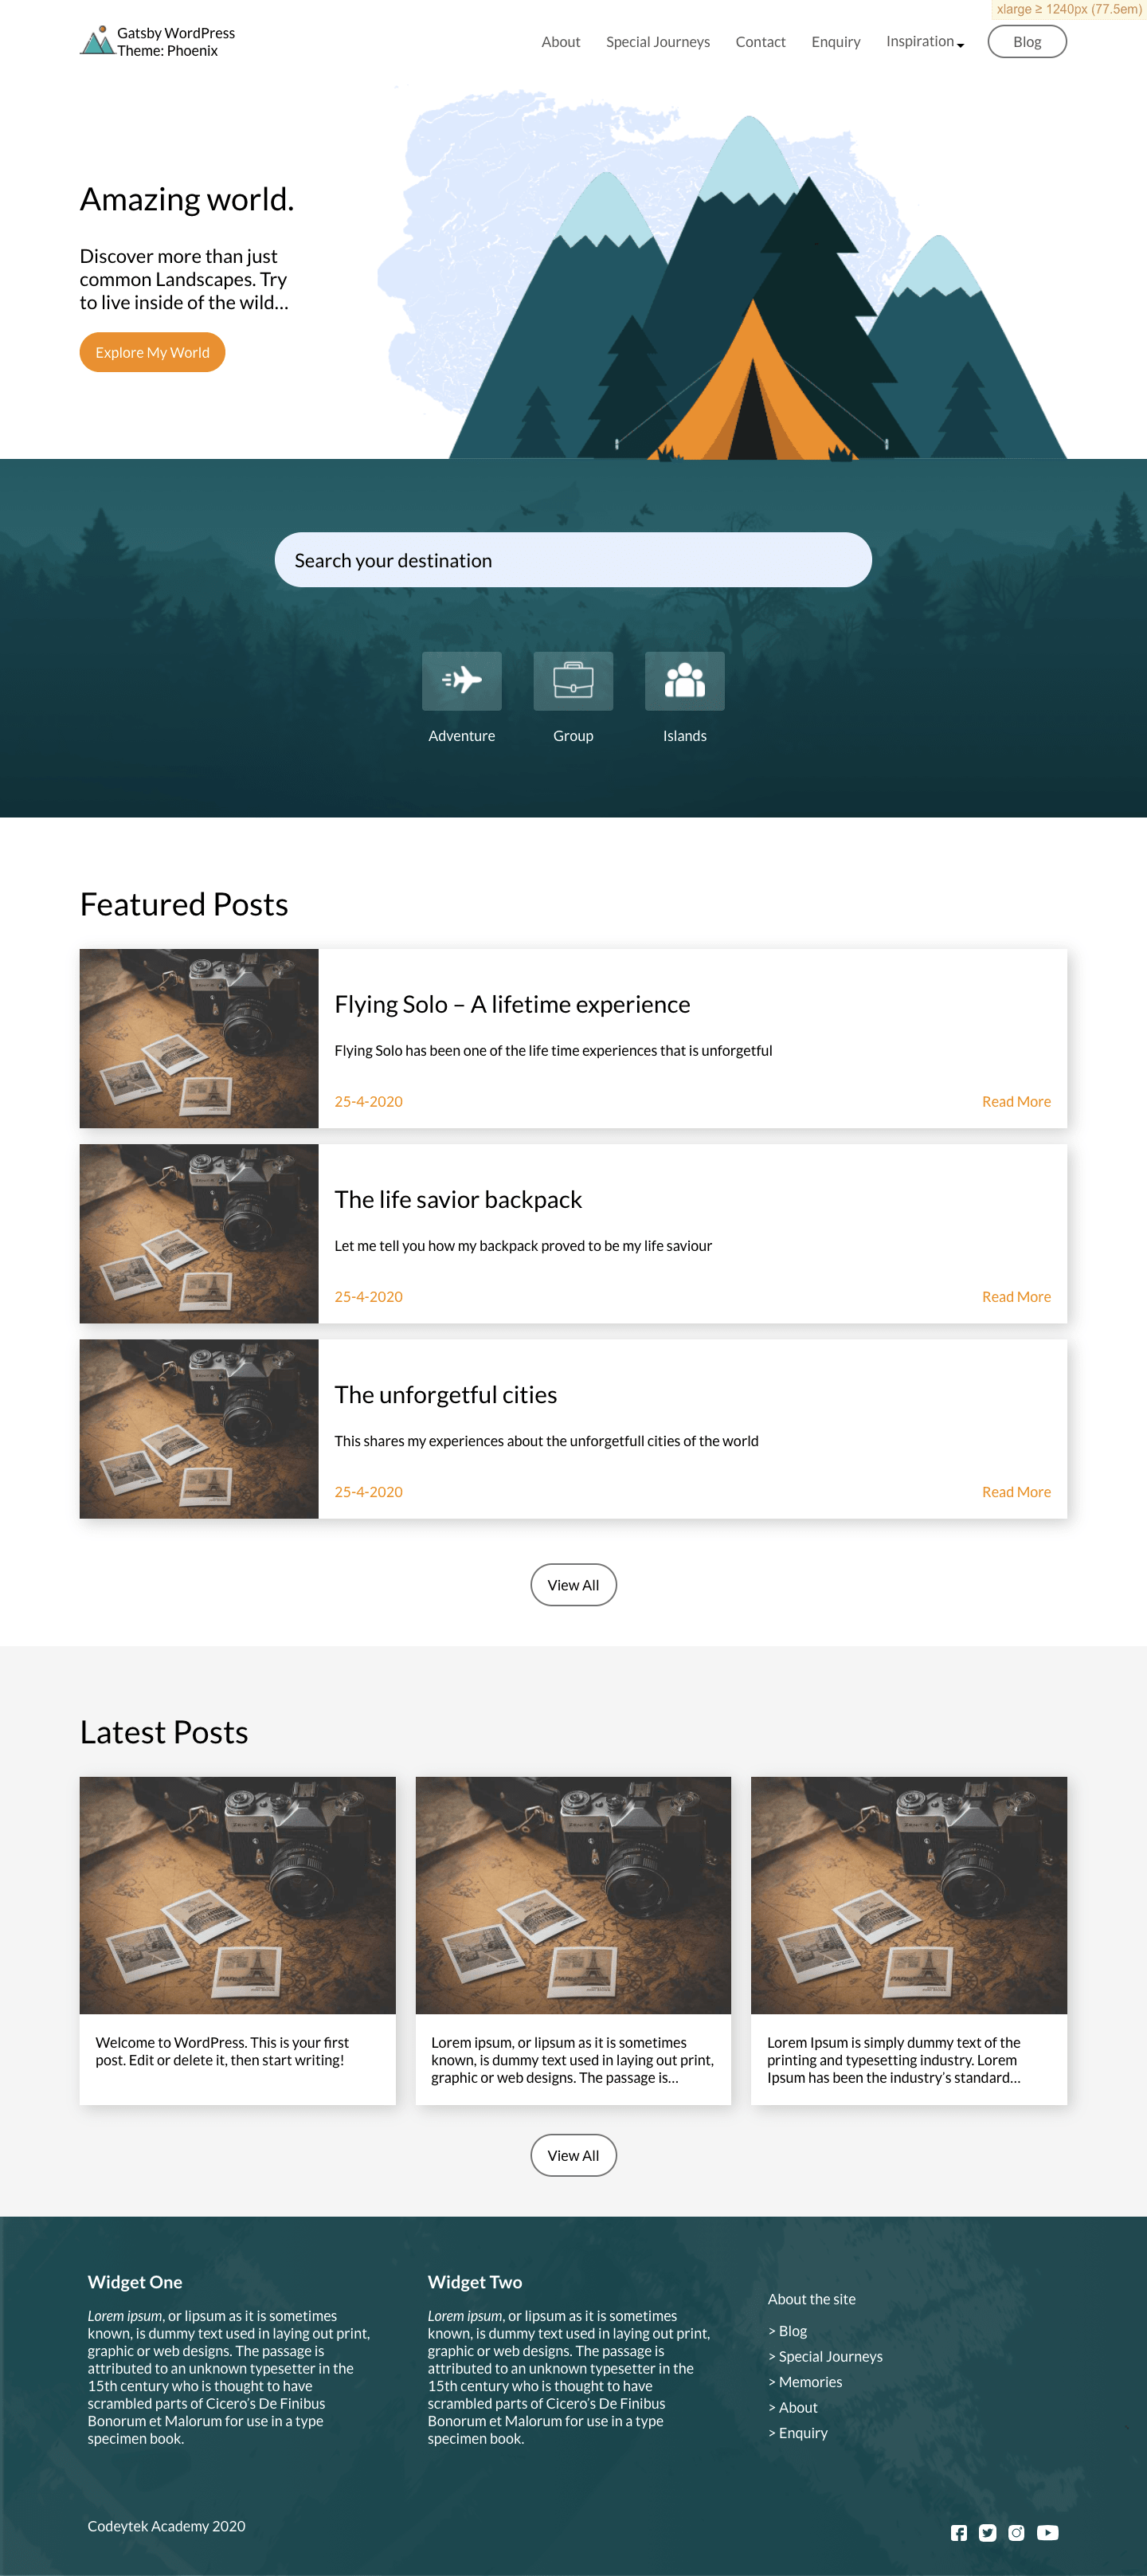
A Gatsby theme for WordPress, using Decoupled Architecture.
Front end in React.
Backend in WordPress.

$3
👨💻 Please star my repo to support my work 🙏
🔥 Features
1. Uses React with Gatsby ( Blazing Fast )
2. PWA ( Works Offline )
3. Image Optimization ( blur effect )
4. ACF
5. GraphQL ( with wp-graphql on WordPress )
6. Blog Page with Pagination
7. Offline Search Feature
8. Categories, Archive Page, Custom Home Page
9. Custom Widgets, Menus
10. Yoast seo support
👨💻 Maintainer
| Name | Github Username |
|--------------------------------------------------------|-----------------|
| Imran Sayed | @imranhsayed |
🌐 Live Demo
- Demo on Netlify
- Demo on Vercel
🚀 Set Up
$3
1. Installation: npm i gatsby-wordpress-theme-phoenix
2. Add the following configuration to your gatsby-config.js and put your WordPress Site URL in wordPressUrl e.g. https://example.com
``javascript`
module.exports = {
plugins: [
// Tell gatsby which theme you will be using.
{
resolve: "gatsby-wordpress-theme-phoenix",
options: {
wordPressUrl: 'xxxx',
frontendUrl: 'https://example.com'
}
} ]
};
Also add the following to your .env file and set the GATSBY_ELEMENTOR_SUPPORT GATSBY_SIDEBAR if you would
like the theme to support page and post building with elementor and sidebar.
`shell script`
GATSBY_WORDPRESS_SITE_URL=xxx
GATSBY_ELEMENTOR_SUPPORT=true
GATSBY_SIDEBAR=false
$3
$3
1. On your WordPress site, download, Upload and activate all the plugins from wordpress/plugins folder of this repo, into your WordPress Site.
a. Headless CMS
b. wp-graphql
c. wp-graphiql
d. ACF WordPress plugin
e. wp-graphql-acf
f. Yoast-SEO
g. wp-graphql-yoast-seo
2.
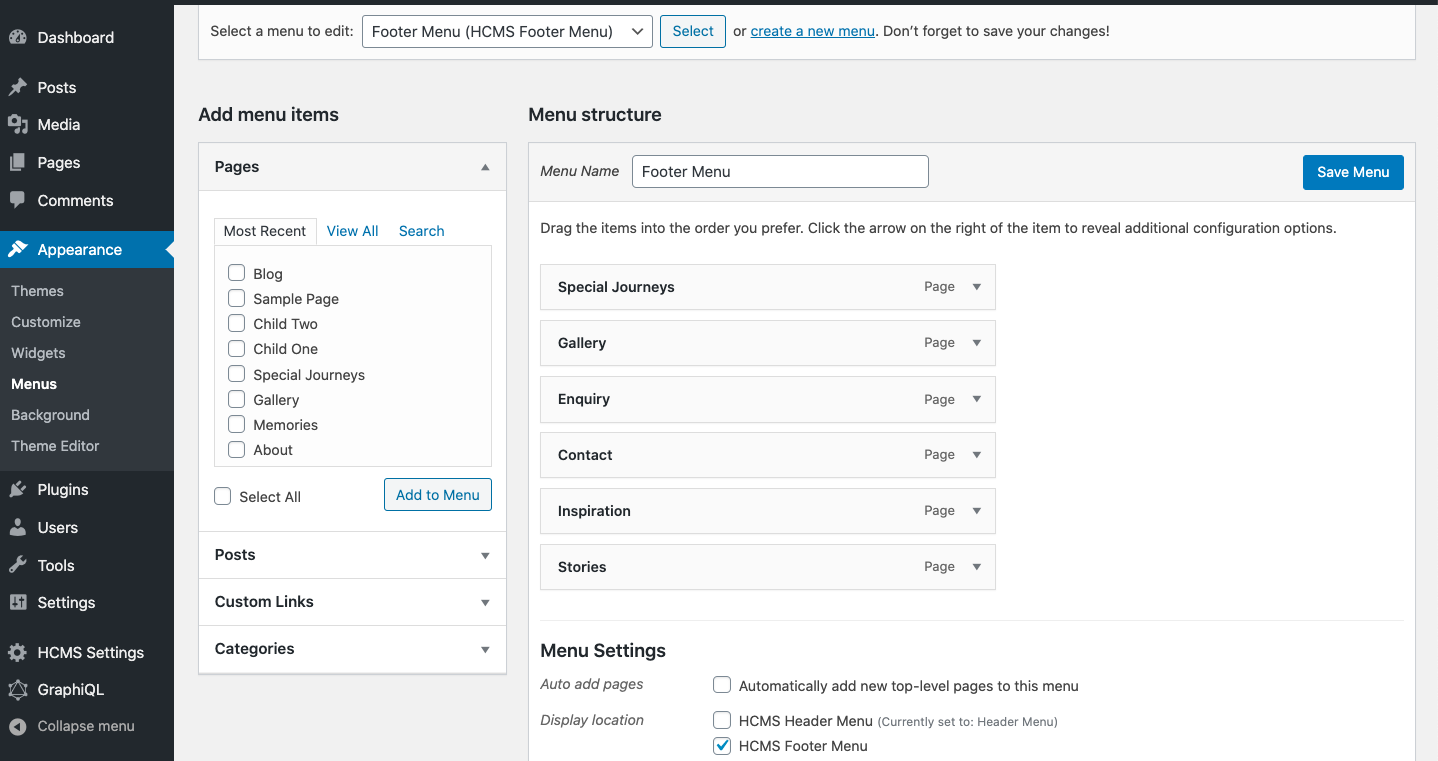
* Set Header menu as HCMS Header Menu
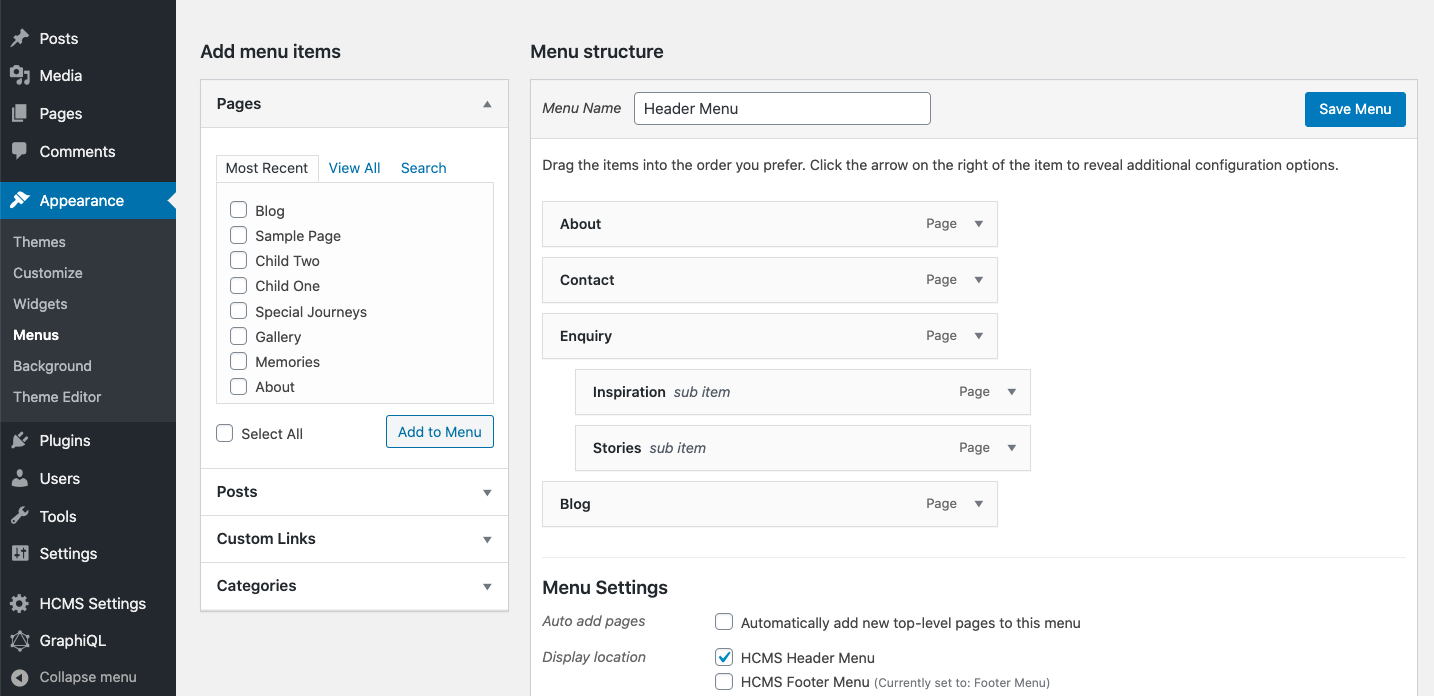
* Set Footer menu as .wordpress/acf-data` json file of this repo, into WordPress by going to WordPress Dashboard > Custom Fields > Tools > Import
3. You can also set text widgets in #HCMS Footer #1 and #HCMS Footer #2 under Appearance > Widgets in WordPress.
4. Import all the ACF data from
5. Create a Home Page ( if there isn't one already )and make sure you have a home page and Location rule is set to Home page.
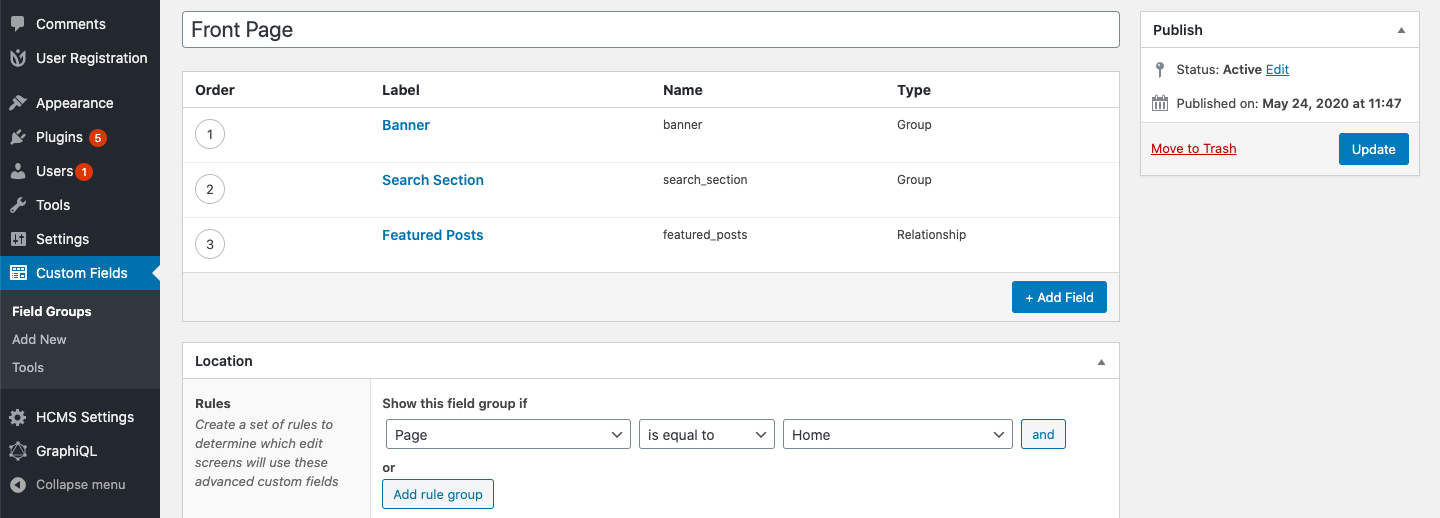
6. Add the ACF required data on the Home page from WordPress Dashboard.
7. If isn't already set your site title, description and logo from WordPress customizer.
Styles used by elementor
Check in the source
* id='elementor-icons-css'
* id='elementor-common-css'