o2-auth-fb-service
v0.4.4TypeScript
[](LICENSE)
0/weekUpdated 3 years agoMIT
Published by Shuichi Ohtsu
npm install o2-auth-fb-service
_o2-auth-fb-service_ Authentication Service by Firebase for Angular5

__o2-auth-fb-service__ is a library for authenticating users by Firebase service by Angular5.
Video Explanation https://youtu.be/WdaarC4sOg8
Overview
_o2-auth-fb-service_ is a tool for using Firebase authentication service by using Angular5
Main functions
- Signup (using Firebase authentication service)
- Login
- GitHub
- Logout
Prerequisite
- Node.js
- TypeScript2
- Angular5
- Firebase
- AngularFire2
Installation
To install this library, run:
``
bash

$ npm install o2-auth-fb-service --save
`
Step by Step Installation of a demo program based on Angular/CLI


$3


Make your some directory for testing and change into the directory.
`bash
$ md test
$ cd test
`
Next run git clone like this.
`bash
$ git clone https://github.com/Ohtsu/o2-auth-fb-service-demo.git
$ cd o2-auth-fb-service-demo
$ npm install
`
$3
Of course you need to have Firebase account and your own project. If you don't have the account, visit the following page in advance and make your own project.
You need to get Firebase config data from your own project page. This url is as follows.
_https://console.firebase.google.com/project/your-project-name/overview_
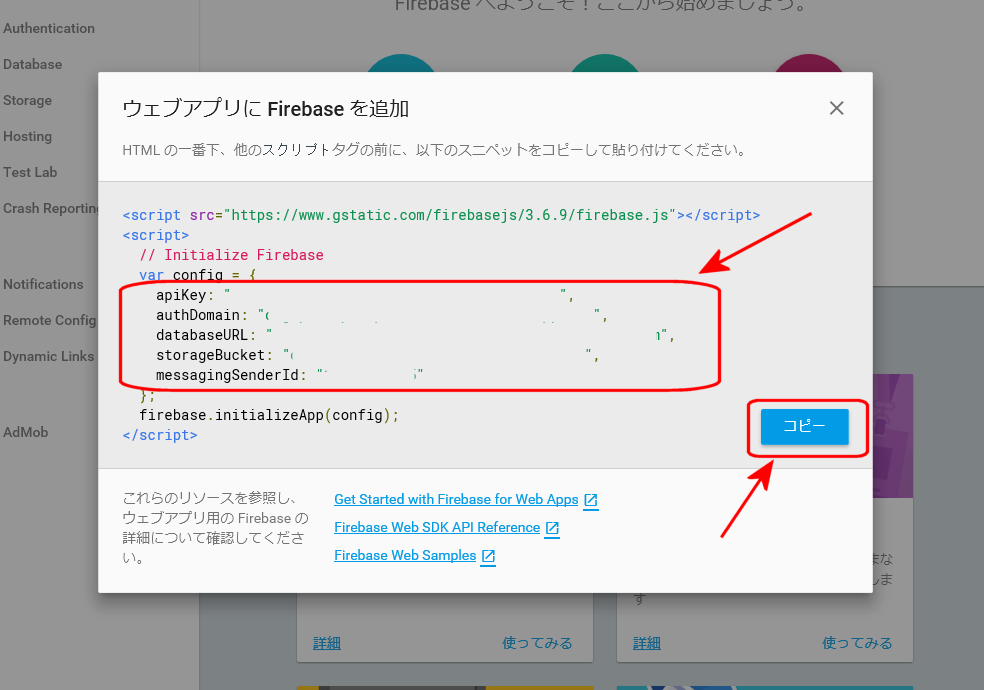
You need the following parameters
- apiKey
- authDomain
- databaseURL
- storageBucket
- messagingSenderId
In "Overview" page, click Web Application icon.
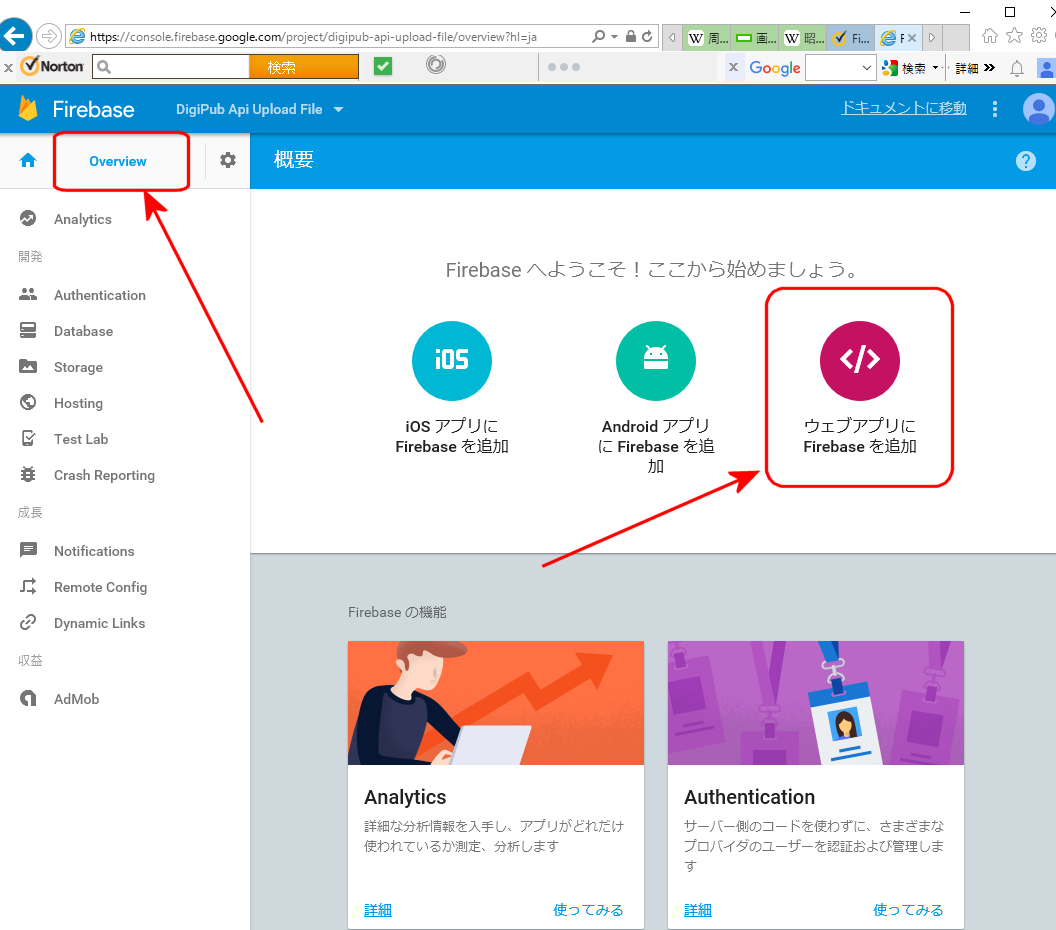
Then those parameters above will be shown. Copy them.
$3
Change directory to "src/app/environments".
`bash
$ cd src/app/environments
`
You will find environment.ts and environment.prod.ts. Modify these files as follows. In firebaseConfig, paste the data above.
`bash
export const environment = {
production: true,
// Add Start --------------------------------------------
firebase: {
apiKey: '"xxxxxxxxxxxxxxxxxxxxxxxxxxxxxxxxxxxxxxxxxxxxx',
authDomain: 'xxxxxxxxxxxxxxxxxx.firebaseapp.com',
databaseURL: 'https://xxxxxxxxxxxxxxxxxx.firebaseio.com',
projectId: 'xxxxxxxxxxxxx',
storageBucket: 'xxxxxxxxxxxxx.appspot.com',
messagingSenderId: 'xxxxxxxxxxxxxxxxxxxxx'
}
// Add End --------------------------------------------
};
`
$3
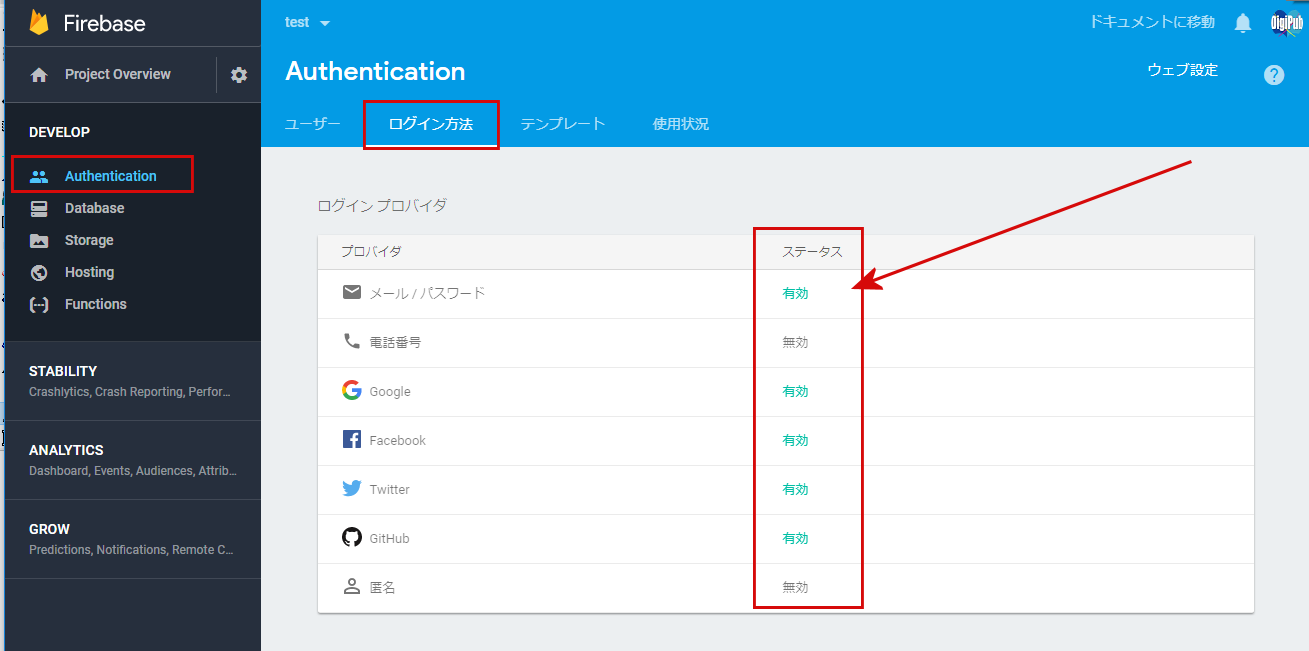
If you want to use the 3rd party authentications such as Google, Facebook, Twitter and GitHub, you need add login methods in Firebase Authentication page.
Set the target login method _enable_ in the status.
$3
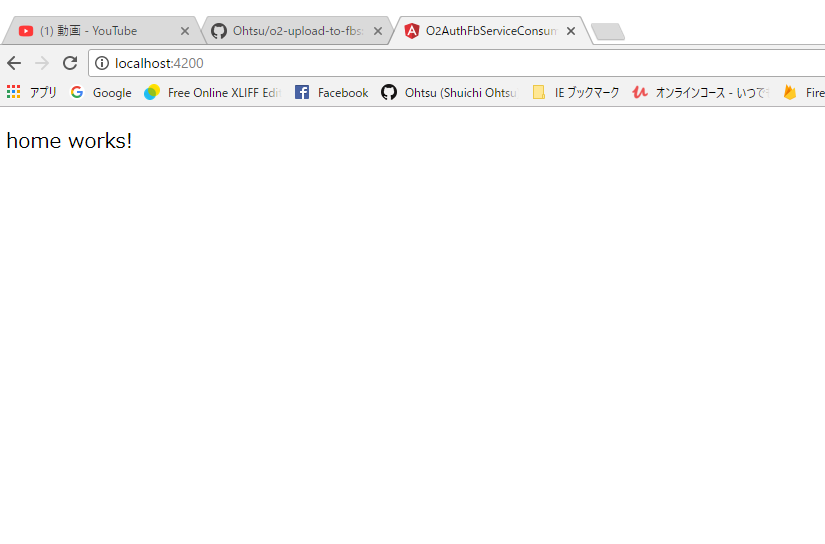
If you start local server as follows, you can get the home page in your browser by accessing http://localhost:4200.
`bash
$ ng serve
``
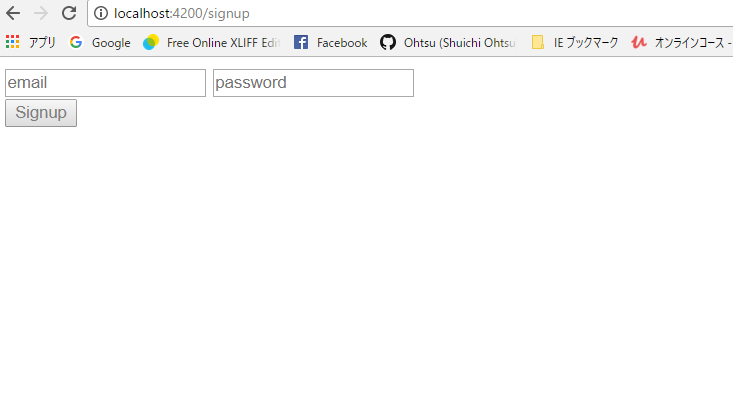
Try change the page by accessing by accessing http://localhost:4200/signup. You will find the following page.
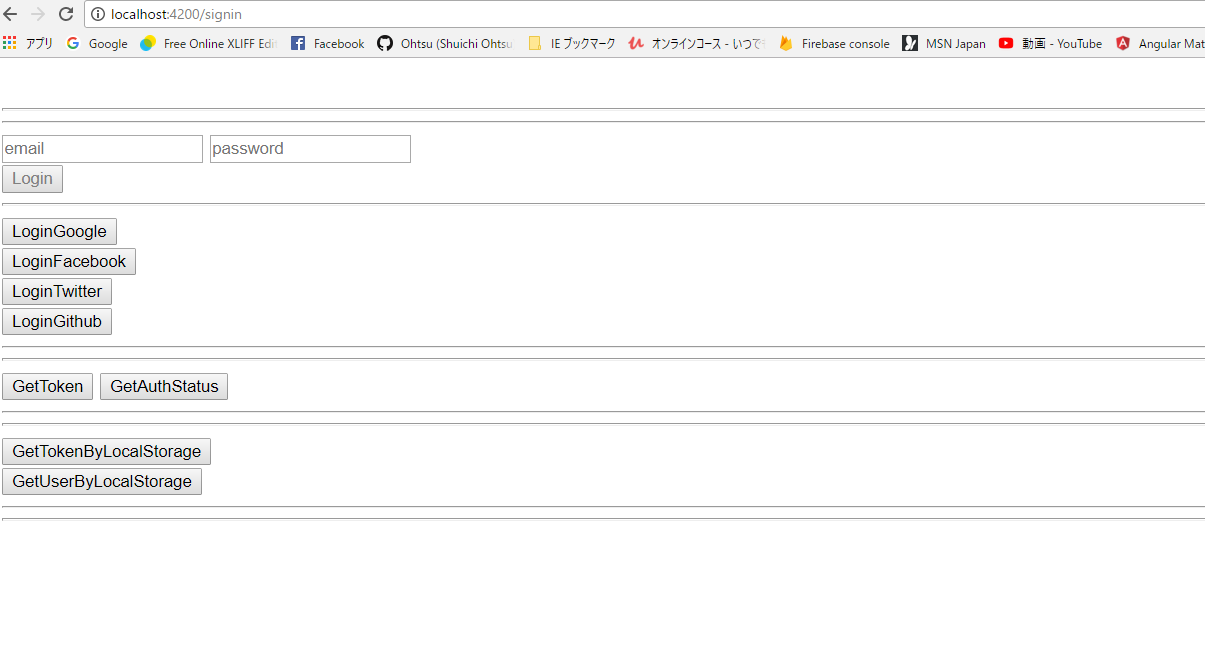
Next change the page by accessing by accessing http://localhost:4200/signin. You will find the following page.
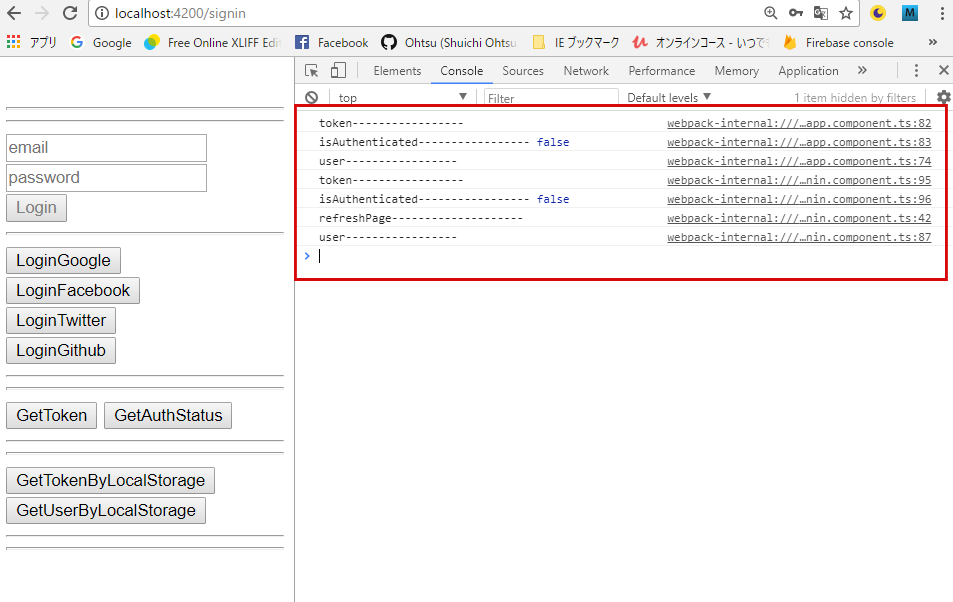
In this page, open the developer tool (type control + shift + i in Chrome) and select Console tab. If you have not logged in yet, you will find is Authenticated ---- false.
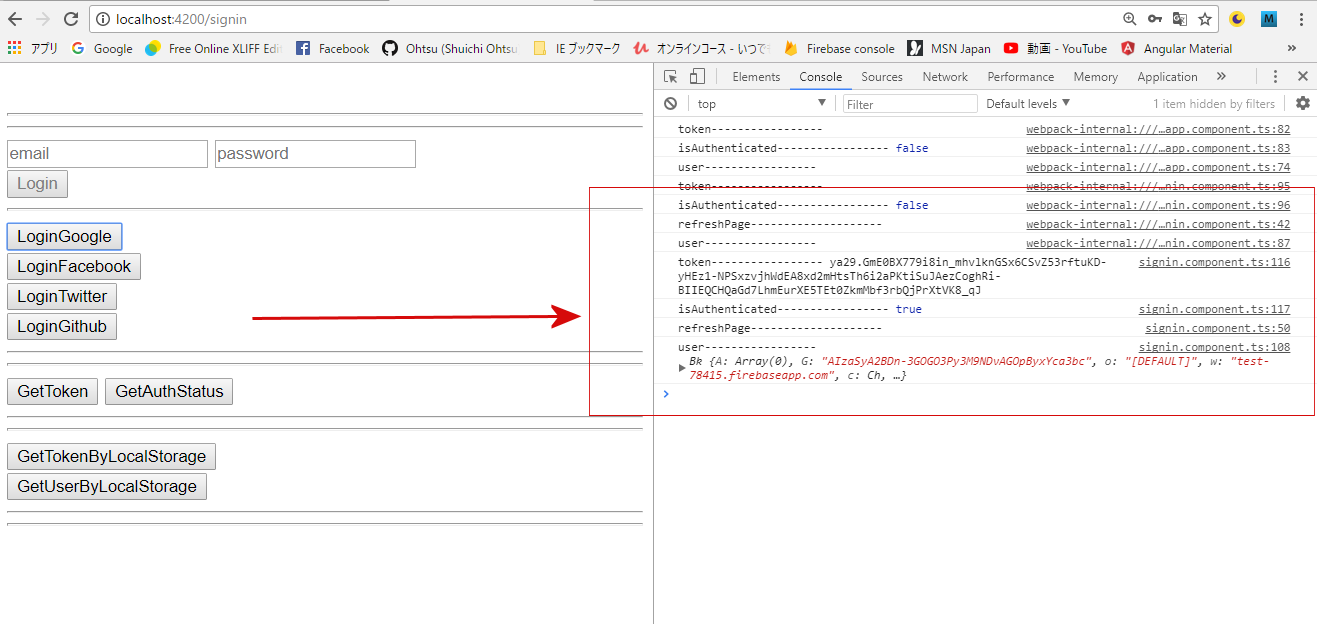
Try to click Login Google button (Of course you need to enable Google login method), you will find Google Login Popup Window.

If you succeed in the authentication, you will find the messages such as is Authenticated ---- true, token ---, user --- and so on.
Version
- _o2-auth-fb-service_ : 0.4.3
- Angular : 5.0.0
- TypeScript : 2.4.2
- @angular/cli : 1.5.0
- firebase : 4.8.0
- angularfire2: 5.0.0-rc.4
Reference
- "Firebase Authentication", Google,
- "Create a Full Angular Authentication System with Firebase",2017/1/16, by Gary Simon
- "Angular アプリケーションプログラミング",2017/8/17,by 山田祥寛,
- "Angular 4 (formerly Angular 2) - The Complete Guide",by Maximilian Schwarzmüller, udemy,
- "The Complete Angular Course: Beginner to Advanced",by Mosh Hamedani, udemy,
- "Build Enterprise Applications with Angular 2 (and Angular 4)",by Mosh Hamedani, udemy,
- "Learn Angular 4 from Scratch",by Gary Simon, udemy,
Change Log
- 2017.12.31 version 0.4.3 uploaded
- 2018.1.10 version 0.4.4 Add Video Explanation URL
Copyright
- copyright 2017 by Shuichi Ohtsu (DigiPub Japan)
License
MIT © Shuichi Ohtsu