simple-ffmpegjs
v0.3.6TypeScript
Declarative video composition for Node.js — define clips, transitions, text, and audio as simple objects, and let FFmpeg handle the rest.
ffmpegvideovideo-editingvideo-processingvideo-compositionvideo-generationaudioaudio-mixingtransitionscrossfade
728/weekUpdated todayMITUnpacked: 334.5 KB
Published by Brayden Blackwell
npm install simple-ffmpegjs

![]()
![]()
A lightweight Node.js library for programmatic video composition using FFmpeg.
Define your timeline as a simple array of clips, and the library handles the rest.
Table of Contents
- Why simple-ffmpeg?
- Features
- Installation
- Quick Start
- Pre-Validation
- Schema Export
- API Reference
- Constructor
- Methods
- Clip Types
- Platform Presets
- Watermarks
- Progress Information
- Logging
- Error Handling
- Cancellation
- Gap Handling
- Examples
- Clips & Transitions
- Text & Animations
- Karaoke
- Subtitles
- Export Settings
- Real-World Usage Patterns
- Data Pipeline
- AI Video Pipeline
- Advanced
- Timeline Behavior
- Auto-Batching
- Testing
- Contributing
- License
Why simple-ffmpeg?
FFmpeg is incredibly powerful, but its command-line interface is notoriously difficult to work with programmatically. Composing even a simple two-clip video with a crossfade requires navigating complex filter graphs, input mapping, and stream labeling. simple-ffmpeg abstracts all of that behind a declarative, config-driven API. You describe _what_ your video should look like, and the library figures out _how_ to build the FFmpeg command.
The entire timeline is expressed as a plain array of clip objects, making it straightforward to generate configurations from any data source: databases, APIs, templates, or AI models. Structured validation with machine-readable error codes means you can catch problems early and handle them programmatically, whether that's logging a warning, retrying with corrected input, or surfacing feedback to an end user.
Example Output
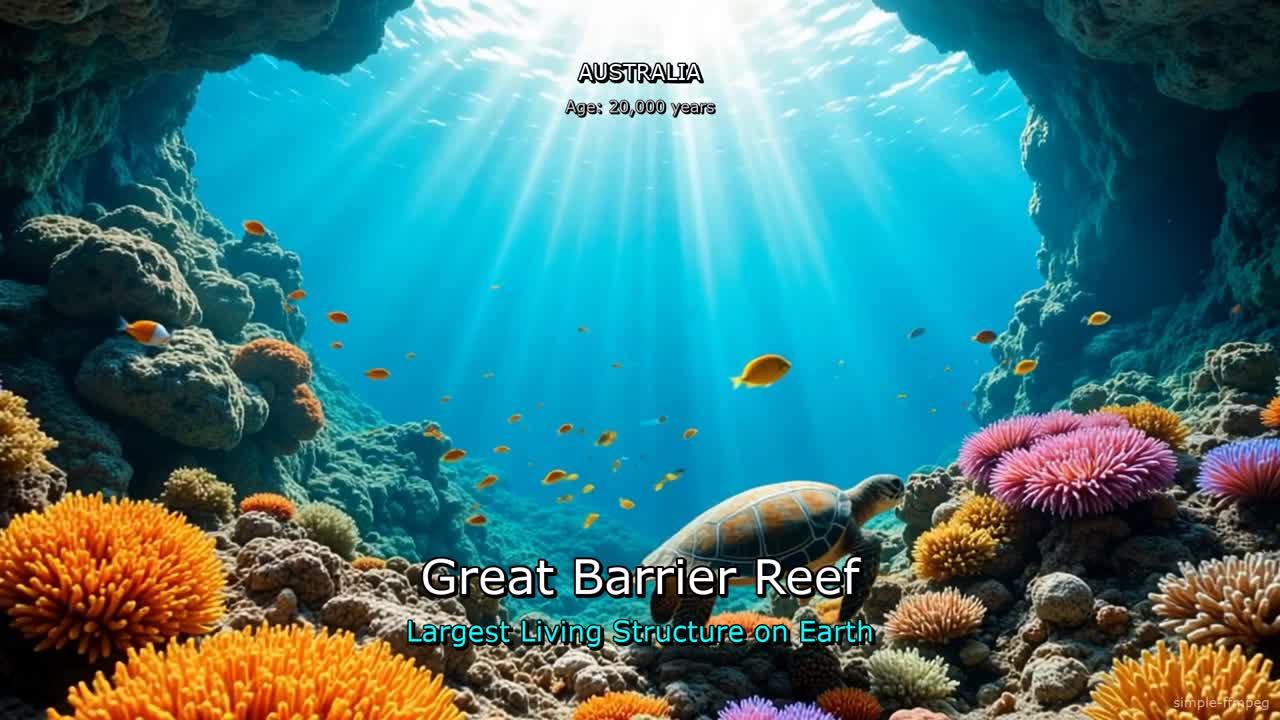
_Click to watch a "Wonders of the World" video created with simple-ffmpeg — combining multiple video clips with crossfade transitions, animated text overlays, and background music._
Features
- Video Concatenation — Join multiple clips with optional xfade transitions
- Audio Mixing — Layer audio tracks, voiceovers, and background music
- Text Overlays — Static, word-by-word, and cumulative text with animations
- Text Animations — Typewriter, scale-in, pulse, fade effects
- Karaoke Mode — Word-by-word highlighting with customizable colors
- Subtitle Import — Load SRT, VTT, ASS/SSA subtitle files
- Watermarks — Text or image overlays with positioning and timing control
- Platform Presets — Quick configuration for TikTok, YouTube, Instagram, etc.
- Image Support — Ken Burns effects (zoom, pan) for static images
- Progress Tracking — Real-time export progress callbacks
- Cancellation — AbortController support for stopping exports
- Gap Handling — Auto-fill timeline gaps with any color (including trailing gaps for text-on-background endings)
- Auto-Batching — Automatically splits complex filter graphs to avoid OS command limits
- Schema Export — Generate a structured description of the clip format for documentation, code generation, or AI context
- Pre-Validation — Validate clip configurations before processing with structured, machine-readable error codes
- TypeScript Ready — Full type definitions included
- Zero Dependencies — Only requires FFmpeg on your system
Installation
``bash`
npm install simple-ffmpegjs
$3
FFmpeg must be installed and available in your PATH:
`bashmacOS
brew install ffmpeg
Ubuntu/Debian
apt-get install ffmpeg
Windows
Download from https://ffmpeg.org/download.html
`
For text overlays, ensure your FFmpeg build includes
and fontconfig. On minimal systems (Docker, Alpine), install a font package:`bash
Alpine
apk add --no-cache ffmpeg fontconfig ttf-dejavuDebian/Ubuntu
apt-get install -y ffmpeg fontconfig fonts-dejavu-core
`Quick Start
js
import SIMPLEFFMPEG from "simple-ffmpegjs";// Use a platform preset — or set width/height/fps manually
const project = new SIMPLEFFMPEG({ preset: "youtube" });
await project.load([
// Two video clips with a crossfade transition between them
{ type: "video", url: "./opening-shot.mp4", position: 0, end: 6 },
{
type: "video",
url: "./highlights.mp4",
position: 5.5,
end: 18,
cutFrom: 3, // start 3s into the source file
transition: { type: "fade", duration: 0.5 },
},
// Title card with a pop animation
{
type: "text",
text: "Summer Highlights 2025",
position: 0.5,
end: 4,
fontFile: "./fonts/Montserrat-Bold.ttf",
fontSize: 72,
fontColor: "#FFFFFF",
borderColor: "#000000",
borderWidth: 2,
xPercent: 0.5,
yPercent: 0.4,
animation: { type: "pop", in: 0.3 },
},
// Background music — loops to fill the whole video
{ type: "music", url: "./chill-beat.mp3", volume: 0.2, loop: true },
]);
await project.export({
outputPath: "./summer-highlights.mp4",
onProgress: ({ percent }) => console.log(
${percent}% complete),
});
`Pre-Validation
Validate clip configurations before creating a project. Useful for catching errors early in data pipelines, form-based editors, or any workflow where configurations are generated dynamically:
js
import SIMPLEFFMPEG from "simple-ffmpegjs";const clips = [
{ type: "video", url: "./intro.mp4", position: 0, end: 5 },
{ type: "text", text: "Hello", position: 1, end: 4 },
];
// Validate without creating a project
const result = SIMPLEFFMPEG.validate(clips, {
skipFileChecks: true, // Skip file existence checks (useful when files aren't on disk yet)
width: 1920, // Project dimensions (for Ken Burns size validation)
height: 1080,
strictKenBurns: false, // If true, undersized Ken Burns images error instead of warn (default: false)
});
if (!result.valid) {
// Structured errors for programmatic handling
result.errors.forEach((err) => {
console.log(
[${err.code}] ${err.path}: ${err.message});
// e.g. [MISSING_REQUIRED] clips[0].url: URL is required for media clips
});
}// Or get human-readable output
console.log(SIMPLEFFMPEG.formatValidationResult(result));
`$3
Access error codes programmatically for custom handling:
js
const { ValidationCodes } = SIMPLEFFMPEG;// Available codes:
// INVALID_TYPE, MISSING_REQUIRED, INVALID_VALUE, INVALID_RANGE,
// INVALID_TIMELINE, TIMELINE_GAP, FILE_NOT_FOUND, INVALID_FORMAT,
// INVALID_WORD_TIMING, OUTSIDE_BOUNDS
if (result.errors.some((e) => e.code === ValidationCodes.TIMELINE_GAP)) {
// Handle gap-specific logic
}
`Schema Export
Export a structured, human-readable description of all clip types accepted by
. The output is designed to serve as context for LLMs, documentation generators, code generation tools, or anything that needs to understand the library's clip format.$3
`js
// Get the full schema (all clip types)
const schema = SIMPLEFFMPEG.getSchema();
console.log(schema);
`The output is a formatted text document with type definitions, allowed values, usage notes, and examples for each clip type.
$3
The schema is broken into modules — one per clip type. You can include or exclude modules to control exactly what appears in the output:
js
// Only include video and image clip types
const schema = SIMPLEFFMPEG.getSchema({ include: ["video", "image"] });// Include everything except text and subtitle
const schema = SIMPLEFFMPEG.getSchema({ exclude: ["text", "subtitle"] });
// See all available module IDs
SIMPLEFFMPEG.getSchemaModules();
// ['video', 'audio', 'image', 'text', 'subtitle', 'music']
`Available modules:
| Module | Covers |
| ---------- | ----------------------------------------------------------- |
|
    | Video clips, transitions, volume, trimming                  |
|
audio | Standalone audio clips |
| image | Image clips, Ken Burns effects |
| text | Text overlays — all modes, animations, positioning, styling |
| subtitle | Subtitle file import (SRT, VTT, ASS, SSA) |
| music | Background music / background audio, looping |$3
Embed your own instructions directly into the schema output. Top-level instructions appear at the beginning, and per-module instructions are placed inside the relevant section — formatted identically to the built-in notes:
`js
const schema = SIMPLEFFMPEG.getSchema({
include: ["video", "image", "music"],
instructions: [
"You are creating short cooking tutorials for TikTok.",
"Keep all videos under 30 seconds.",
],
moduleInstructions: {
video: [
"Always use fade transitions at 0.5s.",
"Limit to 5 clips maximum.",
],
music: "Always include background music at volume 0.15.",
},
});
`Both
and moduleInstructions values accept a string or string[]. Per-module instructions for excluded modules are silently ignored.API Reference
$3
`ts
new SIMPLEFFMPEG(options?: {
width?: number; // Output width (default: 1920)
height?: number; // Output height (default: 1080)
fps?: number; // Frame rate (default: 30)
validationMode?: 'warn' | 'strict'; // Validation behavior (default: 'warn')
fillGaps?: boolean | string; // Gap handling: true/"black", any FFmpeg color, or "none"/false (default: "none")
preset?: string; // Platform preset (e.g., 'tiktok', 'youtube', 'instagram-post')
})
`$3
####
Load clip descriptors into the project. Validates the timeline and reads media metadata.
ts
await project.load(clips: Clip[]): Promise
`####
Calculate the total visual timeline duration from a clips array. Handles
and auto-sequencing shorthand, and subtracts transition overlaps. Pure function — no file I/O.`ts
const clips = [
{ type: "video", url: "./a.mp4", duration: 5 },
{
type: "video",
url: "./b.mp4",
duration: 10,
transition: { type: "fade", duration: 0.5 },
},
];
SIMPLEFFMPEG.getDuration(clips); // 14.5
`Useful for computing text overlay timings or background music end times before calling
.Duration and Auto-Sequencing:
For video, image, and audio clips, you can use shorthand to avoid specifying explicit
position and end values:-
duration — Use instead of end. The library computes end = position + duration. You cannot specify both duration and end on the same clip.
- Omit position — The clip is placed immediately after the previous clip on its track. Video and image clips share the visual track; audio clips have their own track. The first clip defaults to position: 0.These can be combined:
`ts
// Before: manual position/end for every clip
await project.load([
{ type: "video", url: "./a.mp4", position: 0, end: 5 },
{ type: "video", url: "./b.mp4", position: 5, end: 10 },
{ type: "video", url: "./c.mp4", position: 10, end: 18, cutFrom: 3 },
]);// After: auto-sequencing + duration
await project.load([
{ type: "video", url: "./a.mp4", duration: 5 },
{ type: "video", url: "./b.mp4", duration: 5 },
{ type: "video", url: "./c.mp4", duration: 8, cutFrom: 3 },
]);
`You can mix explicit and implicit positioning freely. Clips with explicit
are placed there; subsequent auto-sequenced clips follow from the last clip's end:`ts
await project.load([
{ type: "video", url: "./a.mp4", duration: 5 }, // position: 0, end: 5
{ type: "video", url: "./b.mp4", position: 10, end: 15 }, // explicit gap
{ type: "video", url: "./c.mp4", duration: 5 }, // position: 15, end: 20
]);
`Text clips always require an explicit
(they're overlays on specific moments). Background music and subtitle clips already have optional position/end with their own defaults.####
SIMPLEFFMPEG.probe(filePath)Probe a media file and return comprehensive metadata using ffprobe. Works with video, audio, and image files.
ts
const info = await SIMPLEFFMPEG.probe("./video.mp4");
// {
//   duration: 30.5,         // seconds
//   width: 1920,            // pixels
//   height: 1080,           // pixels
//   hasVideo: true,
//   hasAudio: true,
//   rotation: 0,            // iPhone/mobile rotation
//   videoCodec: "h264",
//   audioCodec: "aac",
//   format: "mov,mp4,m4a,3gp,3g2,mj2",
//   fps: 30,
//   size: 15728640,         // bytes
//   bitrate: 4125000,       // bits/sec
//   sampleRate: 48000,      // Hz
//   channels: 2             // stereo
// }
`Fields that don't apply to the file type are
(e.g. width/height/videoCodec/fps for audio-only files, audioCodec/sampleRate/channels for video-only files).Throws
MediaNotFoundError if the file cannot be found or probed.`ts
// Audio file
const audio = await SIMPLEFFMPEG.probe("./music.wav");
console.log(audio.hasVideo); // false
console.log(audio.duration); // 180.5
console.log(audio.sampleRate); // 44100
`####
Capture a single frame from a video file and save it as an image. This is a static method — no project instance needed.
The output format is determined by the
file extension. FFmpeg handles format detection internally, so .jpg produces JPEG, .png produces PNG, .webp produces WebP, etc.`ts
await SIMPLEFFMPEG.snapshot("./video.mp4", {
outputPath: "./frame.png",
time: 5,
});
`Snapshot Options:
| Option | Type | Default | Description |
| ------------ | -------- | ------- | -------------------------------------------------------------------------- |
|
| string | - | Required. Output image path (extension determines format) |
| time | number | 0 | Time in seconds to capture the frame at |
| width | number | - | Output width in pixels (maintains aspect ratio if height omitted) |
| height | number | - | Output height in pixels (maintains aspect ratio if width omitted) |
| quality | number | 2 | JPEG quality 1-31, lower is better (only applies to .jpg/.jpeg output) |Supported formats:
.jpg / .jpeg, .png, .webp, .bmp, .tiffts
// Save as JPEG with quality control and resize
await SIMPLEFFMPEG.snapshot("./video.mp4", {
outputPath: "./thumb.jpg",
time: 10,
width: 640,
quality: 4,
});// Save as WebP
await SIMPLEFFMPEG.snapshot("./video.mp4", {
outputPath: "./preview.webp",
time: 0,
});
`####
Build and execute the FFmpeg command to render the final video.
ts
await project.export(options?: ExportOptions): Promise
`Export Options:
| Option | Type | Default | Description |
| ----------------------- | ------------- | ---------------- | -------------------------------------------------------------------------------- |
|
| string | './output.mp4' | Output file path |
| videoCodec | string | 'libx264' | Video codec (libx264, libx265, libvpx-vp9, prores_ks, hardware encoders) |
| crf | number | 23 | Quality level (0-51, lower = better) |
| preset | string | 'medium' | Encoding preset (ultrafast to veryslow) |
| videoBitrate | string | - | Target bitrate (e.g., '5M'). Overrides CRF. |
| audioCodec | string | 'aac' | Audio codec (aac, libmp3lame, libopus, flac, copy) |
| audioBitrate | string | '192k' | Audio bitrate |
| audioSampleRate | number | 48000 | Audio sample rate in Hz |
| hwaccel | string | 'none' | Hardware acceleration (auto, videotoolbox, nvenc, vaapi, qsv) |
| outputWidth | number | - | Scale output width |
| outputHeight | number | - | Scale output height |
| outputResolution | string | - | Resolution preset ('720p', '1080p', '4k') |
| audioOnly | boolean | false | Export audio only (no video) |
| twoPass | boolean | false | Two-pass encoding for better quality |
| metadata | object | - | Embed metadata (title, artist, etc.) |
| thumbnail | object | - | Generate thumbnail image |
| verbose | boolean | false | Enable verbose logging |
| saveCommand | string | - | Save FFmpeg command to file |
| onProgress | function | - | Progress callback |
| onLog | function | - | FFmpeg log callback (see Logging section) |
| signal | AbortSignal | - | Cancellation signal |
| watermark | object | - | Add watermark overlay (see Watermarks section) |
| compensateTransitions | boolean | true | Auto-adjust text timings for transition overlap (see below) |####
project.preview(options)Get the FFmpeg command without executing it. Useful for debugging or dry runs.
ts
await project.preview(options?: ExportOptions): Promise<{
  command: string;        // Full FFmpeg command
  filterComplex: string;  // Filter graph
  totalDuration: number;  // Expected output duration
}>
`$3
#### Video Clip
ts
{
  type: "video";
  url: string;              // File path
  position?: number;        // Timeline start (seconds). Omit to auto-sequence after previous clip.
  end?: number;             // Timeline end (seconds). Use end OR duration, not both.
  duration?: number;        // Duration in seconds (alternative to end). end = position + duration.
  cutFrom?: number;         // Source offset (default: 0)
  volume?: number;          // Audio volume (default: 1)
  transition?: {
    type: string;           // Any xfade transition (e.g., 'fade', 'wipeleft', 'dissolve')
    duration: number;       // Transition duration in seconds
  };
}
`All xfade transitions are supported.
#### Audio Clip
ts
{
  type: "audio";
  url: string;
  position?: number;        // Omit to auto-sequence after previous audio clip
  end?: number;             // Use end OR duration, not both
  duration?: number;        // Duration in seconds (alternative to end)
  cutFrom?: number;
  volume?: number;
}
`#### Background Music
ts
{
  type: "music";            // or "backgroundAudio"
  url: string;
  position?: number;        // default: 0
  end?: number;             // default: project duration
  cutFrom?: number;
  volume?: number;          // default: 0.2
  loop?: boolean;           // Loop audio to fill video duration
}
`Background music is mixed after transitions, so video crossfades won't affect its volume.
Looping Music:
If your music track is shorter than your video, enable looping:
ts
await project.load([
  { type: "video", url: "./video.mp4", position: 0, end: 120 },
  { type: "music", url: "./30s-track.mp3", volume: 0.3, loop: true },
]);
`#### Image Clip
ts
{
  type: "image";
  url: string;
  position?: number;        // Omit to auto-sequence after previous video/image clip
  end?: number;             // Use end OR duration, not both
  duration?: number;        // Duration in seconds (alternative to end)
  width?: number;           // Optional: source image width (skip probe / override)
  height?: number;          // Optional: source image height (skip probe / override)
  kenBurns?:
    | "zoom-in" | "zoom-out" | "pan-left" | "pan-right" | "pan-up" | "pan-down"
    | "smart" | "custom"
    | {
        type?: "zoom-in" | "zoom-out" | "pan-left" | "pan-right" | "pan-up" | "pan-down" | "smart" | "custom";
        startZoom?: number;
        endZoom?: number;
        startX?: number;     // 0 = left, 1 = right
        startY?: number;     // 0 = top, 1 = bottom
        endX?: number;
        endY?: number;
        anchor?: "top" | "bottom" | "left" | "right";
        easing?: "linear" | "ease-in" | "ease-out" | "ease-in-out";
      };
}
`#### Text Clip
ts
{
  type: "text";
  position: number;
  end?: number;             // Use end OR duration, not both
  duration?: number;        // Duration in seconds (alternative to end)  // Content
  text?: string;
  mode?: "static" | "word-replace" | "word-sequential" | "karaoke";
  words?: Array<{ text: string; start: number; end: number }>;
  wordTimestamps?: number[];  // Styling
  fontFile?: string;        // Custom font file path
  fontFamily?: string;      // System font (default: 'Sans')
  fontSize?: number;        // default: 48
  fontColor?: string;       // default: '#FFFFFF'
  borderColor?: string;
  borderWidth?: number;
  shadowColor?: string;
  shadowX?: number;
  shadowY?: number;  // Positioning (omit x/y to center)
  xPercent?: number;        // Horizontal position as % (0 = left, 0.5 = center, 1 = right)
  yPercent?: number;        // Vertical position as % (0 = top, 0.5 = center, 1 = bottom)
  x?: number;               // Absolute X position in pixels
  y?: number;               // Absolute Y position in pixels
  xOffset?: number;         // Pixel offset added to X (works with any positioning method)
  yOffset?: number;         // Pixel offset added to Y (e.g., center + 50px below)  // Animation
  animation?: {
    type: "none" | "fade-in" | "fade-in-out" | "fade-out" | "pop" | "pop-bounce"
        | "typewriter" | "scale-in" | "pulse";
    in?: number;            // Intro duration (seconds)
    out?: number;           // Outro duration (seconds)
    speed?: number;         // For typewriter (chars/sec) or pulse (pulses/sec)
    intensity?: number;     // For scale-in or pulse (size variation 0-1)
  };  highlightColor?: string;  // For karaoke mode (default: '#FFFF00')
  highlightStyle?: "smooth" | "instant";  // 'smooth' = gradual fill, 'instant' = immediate change (default: 'smooth')
}
`#### Subtitle Clip
Import external subtitle files (SRT, VTT, ASS/SSA):
ts
{
  type: "subtitle";
  url: string;              // Path to subtitle file
  position?: number;        // Time offset in seconds (default: 0)  // Styling (for SRT/VTT - ASS files use their own styles)
  fontFamily?: string;
  fontSize?: number;
  fontColor?: string;
  borderColor?: string;
  borderWidth?: number;
  opacity?: number;
}
`$3
Use platform presets to quickly configure optimal dimensions for social media:
ts
const project = new SIMPLEFFMPEG({ preset: "tiktok" });
`Available presets:
| Preset | Resolution | Aspect Ratio | Use Case |
| -------------------- | ----------- | ------------ | ----------------------- |
|
             | 1080 × 1920 | 9:16         | TikTok, vertical videos |
|
youtube-short | 1080 × 1920 | 9:16 | YouTube Shorts |
| instagram-reel | 1080 × 1920 | 9:16 | Instagram Reels |
| instagram-story | 1080 × 1920 | 9:16 | Instagram Stories |
| snapchat | 1080 × 1920 | 9:16 | Snapchat |
| instagram-post | 1080 × 1080 | 1:1 | Instagram feed posts |
| instagram-square | 1080 × 1080 | 1:1 | Square format |
| youtube | 1920 × 1080 | 16:9 | YouTube standard |
| twitter | 1920 × 1080 | 16:9 | Twitter/X horizontal |
| facebook | 1920 × 1080 | 16:9 | Facebook horizontal |
| landscape | 1920 × 1080 | 16:9 | General landscape |
| twitter-portrait | 1080 × 1350 | 4:5 | Twitter portrait |
| instagram-portrait | 1080 × 1350 | 4:5 | Instagram portrait |Override preset values with explicit options:
`ts
const project = new SIMPLEFFMPEG({
preset: "tiktok",
fps: 60, // Override default 30fps
});
`Query available presets programmatically:
ts
SIMPLEFFMPEG.getPresetNames(); // ['tiktok', 'youtube-short', ...]
SIMPLEFFMPEG.getPresets(); // { tiktok: { width: 1080, height: 1920, fps: 30 }, ... }
`$3
Add text or image watermarks to your videos:
Text Watermark:
ts
await project.export({
  outputPath: "./output.mp4",
  watermark: {
    type: "text",
    text: "@myhandle",
    position: "bottom-right", // 'top-left', 'top-right', 'bottom-left', 'bottom-right', 'center'
    fontSize: 24,
    fontColor: "#FFFFFF",
    opacity: 0.7,
    margin: 20,
  },
});
`Image Watermark:
ts
await project.export({
  outputPath: "./output.mp4",
  watermark: {
    type: "image",
    url: "./logo.png",
    position: "top-right",
    opacity: 0.8,
    scale: 0.5, // Scale to 50% of original size
    margin: 15,
  },
});
`Timed Watermark:
ts
await project.export({
  outputPath: "./output.mp4",
  watermark: {
    type: "text",
    text: "Limited Time!",
    position: "top-left",
    startTime: 5, // Appear at 5 seconds
    endTime: 15, // Disappear at 15 seconds
  },
});
`Custom Position:
ts
await project.export({
  outputPath: "./output.mp4",
  watermark: {
    type: "text",
    text: "Custom",
    x: 100, // Exact X position in pixels
    y: 50, // Exact Y position in pixels
  },
});
`$3
The
callback receives:`ts
{
percent?: number; // 0-100
phase?: string; // "rendering" or "batching"
timeProcessed?: number; // Seconds processed
frame?: number; // Current frame
fps?: number; // Processing speed
speed?: number; // Multiplier (e.g., 2.0 = 2x realtime)
}
`The
field indicates what the export is doing:-
"rendering" — main video export (includes percent, frame, etc.)
- "batching" — text overlay passes are running (fired once when batching starts)Use
phase to update your UI when the export hits 100% but still has work to do:`ts
onProgress: ({ percent, phase }) => {
if (phase === "batching") {
console.log("Applying text overlays...");
} else {
console.log(${percent}%);
}
};
`$3
Use the
callback to receive real-time FFmpeg output. Each log entry includes a level ("stderr" or "stdout") and the raw message string. This is useful for debugging, monitoring, or piping FFmpeg output to your own logging system.`ts
await project.export({
outputPath: "./output.mp4",
onLog: ({ level, message }) => {
console.log([ffmpeg:${level}] ${message});
},
});
`The callback fires for every data chunk FFmpeg writes, including encoding stats, warnings, and codec information. It works alongside
— both can be used simultaneously.$3
The library provides custom error classes for structured error handling:
| Error Class | When Thrown | Properties |
| ---------------------- | -------------------------- | --------------------------------------------------------------------------- |
|
ValidationError | Invalid clip configuration | errors[], warnings[] (structured issues with code, path, message) |
| FFmpegError | FFmpeg command fails | stderr, command, exitCode, details |
| MediaNotFoundError | File not found | path |
| ExportCancelledError | Export aborted | - |`ts
try {
await project.export({ outputPath: "./out.mp4" });
} catch (error) {
if (error.name === "ValidationError") {
// Structured validation errors
error.errors.forEach((e) =>
console.error([${e.code}] ${e.path}: ${e.message}),
);
error.warnings.forEach((w) =>
console.warn([${w.code}] ${w.path}: ${w.message}),
);
} else if (error.name === "FFmpegError") {
// Structured details for bug reports (last 50 lines of stderr, command, exitCode)
console.error("FFmpeg failed:", error.details);
// { stderrTail: "...", command: "ffmpeg ...", exitCode: 1 }
} else if (error.name === "MediaNotFoundError") {
console.error("File not found:", error.path);
} else if (error.name === "ExportCancelledError") {
console.log("Export was cancelled");
}
}
`$3
Use an
to cancel an export in progress:`ts
const controller = new AbortController();// Cancel after 5 seconds
setTimeout(() => controller.abort(), 5000);
try {
await project.export({
outputPath: "./out.mp4",
signal: controller.signal,
});
} catch (error) {
if (error.name === "ExportCancelledError") {
console.log("Cancelled");
}
}
`$3
By default, timeline gaps (periods with no video/image content) produce a validation warning. Enable automatic gap filling to insert solid-color frames wherever there's no visual media — leading gaps, middle gaps, and trailing gaps are all handled:
ts
const project = new SIMPLEFFMPEG({
fillGaps: "black", // Fill gaps with black frames
});await project.load([
{ type: "video", url: "./clip.mp4", position: 2, end: 5 }, // Leading gap from 0-2s filled with black
]);
` accepts any valid FFmpeg color — named colors, hex codes, or true as shorthand for "black":`ts
// Custom color fill
const project = new SIMPLEFFMPEG({ fillGaps: "#0a0a2e" }); // dark navy
const project = new SIMPLEFFMPEG({ fillGaps: "navy" }); // named color
const project = new SIMPLEFFMPEG({ fillGaps: true }); // same as "black"
`All three gap types are supported:
- Leading gaps — no visual media at the start of the timeline (e.g. video starts at 2s, gap from 0-2s)
- Middle gaps — periods between visual clips with no media
- Trailing gaps — text or audio extends past the last visual clip, so the video is extended with the fill color
Trailing gaps are useful for ending a video with text on a solid background:
ts
const project = new SIMPLEFFMPEG({ fillGaps: "#1a1a2e" });await project.load([
{ type: "video", url: "./clip.mp4", position: 0, end: 5 },
// Text extends 5 seconds past the video — dark blue fill from 5-10s
{ type: "text", text: "The End", position: 4, end: 10, fontSize: 64, fontColor: "white" },
]);
`Examples
$3
ts
// Two clips with a crossfade
await project.load([
{ type: "video", url: "./a.mp4", position: 0, end: 5 },
{
type: "video",
url: "./b.mp4",
position: 5,
end: 10,
transition: { type: "fade", duration: 0.5 },
},
]);
`Image slideshow with Ken Burns effects:
ts
await project.load([
{ type: "image", url: "./photo1.jpg", duration: 3, kenBurns: "zoom-in" },
{ type: "image", url: "./photo2.jpg", duration: 3, kenBurns: "pan-right" },
{ type: "image", url: "./photo3.jpg", duration: 3, kenBurns: "zoom-out" },
{ type: "music", url: "./music.mp3", volume: 0.3 },
]);
`Custom Ken Burns (smart anchor + explicit endpoints):
ts
await project.load([
{
type: "image",
url: "./portrait.jpg",
duration: 5,
kenBurns: {
type: "smart",
anchor: "bottom",
startZoom: 1.05,
endZoom: 1.2,
easing: "ease-in-out",
},
},
{
type: "image",
url: "./wide.jpg",
duration: 4,
kenBurns: {
type: "custom",
startX: 0.15,
startY: 0.7,
endX: 0.85,
endY: 0.2,
easing: "ease-in-out",
},
},
]);
`When
is omitted, clips are placed sequentially — each one starts where the previous one ended. duration is an alternative to end: the library computes end = position + duration. The explicit form (position: 0, end: 3) still works identically.> Note: Ken Burns effects work best with images at least as large as your output resolution. Smaller images are automatically upscaled (with a validation warning). Use
strictKenBurns: true in validation options to enforce size requirements instead.
> If you pass width/height, they override probed dimensions (useful for remote or generated images).
> smart mode uses source vs output aspect (when known) to choose pan direction.$3
Text is centered by default. Use
xPercent/yPercent for percentage positioning, x/y for pixels, or xOffset/yOffset to nudge from any base:`ts
await project.load([
{ type: "video", url: "./bg.mp4", position: 0, end: 10 },
// Title: centered, 100px above center
{
type: "text",
text: "Main Title",
position: 0,
end: 5,
fontSize: 72,
yOffset: -100,
},
// Subtitle: centered, 50px below center
{
type: "text",
text: "Subtitle here",
position: 0.5,
end: 5,
fontSize: 36,
yOffset: 50,
},
]);
`Word-by-word replacement:
ts
{
type: "text",
mode: "word-replace",
text: "One Two Three Four",
position: 2,
end: 6,
wordTimestamps: [2, 3, 4, 5, 6],
animation: { type: "fade-in", in: 0.2 },
fontSize: 72,
fontColor: "white",
}
`Typewriter, pulse, and other animations:
ts
// Typewriter — letters appear one at a time
{ type: "text", text: "Appearing letter by letter...", position: 1, end: 4,
animation: { type: "typewriter", speed: 15 } }// Pulse — rhythmic scaling
{ type: "text", text: "Pulsing...", position: 0.5, end: 4.5,
animation: { type: "pulse", speed: 2, intensity: 0.2 } }
// Also available: fade-in, fade-out, fade-in-out, pop, pop-bounce, scale-in
`$3
Word-by-word highlighting with customizable colors. Use
for immediate color changes instead of the default smooth fill:`ts
await project.load([
{ type: "video", url: "./music-video.mp4", position: 0, end: 10 },
{
type: "text",
mode: "karaoke",
text: "Never gonna give you up",
position: 0,
end: 5,
words: [
{ text: "Never", start: 0, end: 0.8 },
{ text: "gonna", start: 0.8, end: 1.4 },
{ text: "give", start: 1.4, end: 2.0 },
{ text: "you", start: 2.0, end: 2.5 },
{ text: "up", start: 2.5, end: 3.5 },
],
fontColor: "#FFFFFF",
highlightColor: "#00FF00",
fontSize: 52,
yPercent: 0.85,
},
]);
`For simple usage without explicit word timings, just provide
and wordTimestamps — the library will split on spaces. Multi-line karaoke is supported with \n in the text string or lineBreak: true in the words array.$3
Import external subtitle files (SRT, VTT, ASS/SSA):
`ts
await project.load([
{ type: "video", url: "./video.mp4", position: 0, end: 60 },
{
type: "subtitle",
url: "./subtitles.srt", // or .vtt, .ass, .ssa
fontSize: 24,
fontColor: "#FFFFFF",
borderColor: "#000000",
},
]);
`Use
to offset all subtitle timestamps forward (e.g., position: 2.5 delays everything by 2.5s). ASS/SSA files use their own embedded styles — font options are for SRT/VTT imports.$3
`ts
// High-quality H.265 with metadata
await project.export({
outputPath: "./output.mp4",
videoCodec: "libx265",
crf: 18,
preset: "slow",
audioCodec: "libopus",
audioBitrate: "256k",
metadata: { title: "My Video", artist: "My Name", date: "2025" },
});// Hardware-accelerated (macOS)
await project.export({
outputPath: "./output.mp4",
hwaccel: "videotoolbox",
videoCodec: "h264_videotoolbox",
});
// Two-pass encoding for target file size
await project.export({
outputPath: "./output.mp4",
twoPass: true,
videoBitrate: "5M",
preset: "slow",
});
// Scale output resolution
await project.export({ outputPath: "./720p.mp4", outputResolution: "720p" });
// Audio-only export
await project.export({
outputPath: "./audio.mp3",
audioOnly: true,
audioCodec: "libmp3lame",
audioBitrate: "320k",
});
// Generate thumbnail
await project.export({
outputPath: "./output.mp4",
thumbnail: { outputPath: "./thumb.jpg", time: 5, width: 640 },
});
// Debug — save the FFmpeg command to a file
await project.export({
outputPath: "./output.mp4",
verbose: true,
saveCommand: "./ffmpeg-command.txt",
});
`Advanced
$3
- Clip timing uses
intervals in seconds
- Transitions create overlaps that reduce total duration
- Background music is mixed after video transitions (unaffected by crossfades)Transition Compensation:
FFmpeg's
xfade transitions overlap clips, compressing the timeline. A 1s fade between two 10s clips produces 19s of output, not 20s. With multiple transitions this compounds.By default, simple-ffmpeg automatically adjusts text and subtitle timings to compensate. When you position text at "15s", it appears at the visual 15s mark regardless of how many transitions preceded it:
`ts
await project.load([
{ type: "video", url: "./a.mp4", position: 0, end: 10 },
{
type: "video",
url: "./b.mp4",
position: 10,
end: 20,
transition: { type: "fade", duration: 1 },
},
{ type: "text", text: "Appears at 15s visual", position: 15, end: 18 },
]);
`Disable with
in export options if you've pre-calculated offsets yourself.$3
FFmpeg's
filter_complex has platform-specific length limits (Windows ~32KB, macOS ~1MB, Linux ~2MB). When text animations create many filter nodes, the command can exceed these limits.simple-ffmpeg handles this automatically — detecting oversized filter graphs and splitting text overlays into multiple rendering passes with intermediate files. No configuration needed.
For very complex projects, you can tune it:
`js
await project.export({
textMaxNodesPerPass: 30, // default: 75
intermediateVideoCodec: "libx264", // default
intermediateCrf: 18, // default (high quality)
intermediatePreset: "veryfast", // default (fast encoding)
});
`Batching activates for typewriter animations with long text, many simultaneous text overlays, or complex animation combinations. With
, you'll see when it kicks in.Real-World Usage Patterns
$3
Generate videos programmatically from structured data — database records, API responses, CMS content, etc. This example creates property tour videos from real estate listings:
`js
import SIMPLEFFMPEG from "simple-ffmpegjs";const listings = await db.getActiveListings(); // your data source
async function generateListingVideo(listing, outputPath) {
const photos = listing.photos; // ['kitchen.jpg', 'living-room.jpg', ...]
const slideDuration = 4;
// Build an image slideshow from listing photos (auto-sequenced with crossfades)
const transitionDuration = 0.5;
const photoClips = photos.map((photo, i) => ({
type: "image",
url: photo,
duration: slideDuration,
kenBurns: i % 2 === 0 ? "zoom-in" : "pan-right",
...(i > 0 && {
transition: { type: "fade", duration: transitionDuration },
}),
}));
const totalDuration = SIMPLEFFMPEG.getDuration(photoClips);
const clips = [
...photoClips,
// Price banner
{
type: "text",
text: listing.price,
position: 0.5,
end: totalDuration - 0.5,
fontSize: 36,
fontColor: "#FFFFFF",
backgroundColor: "#000000",
backgroundOpacity: 0.6,
padding: 12,
xPercent: 0.5,
yPercent: 0.1,
},
// Address at the bottom
{
type: "text",
text: listing.address,
position: 0.5,
end: totalDuration - 0.5,
fontSize: 28,
fontColor: "#FFFFFF",
borderColor: "#000000",
borderWidth: 2,
xPercent: 0.5,
yPercent: 0.9,
},
{ type: "music", url: "./assets/ambient.mp3", volume: 0.15, loop: true },
];
const project = new SIMPLEFFMPEG({ preset: "instagram-reel" });
await project.load(clips);
return project.export({ outputPath });
}
// Batch generate videos for all listings
for (const listing of listings) {
await generateListingVideo(listing,
./output/${listing.id}.mp4);
}
`$3
Combine schema export, validation, and structured error codes to build a complete AI-driven video generation pipeline. The schema gives the model the exact specification it needs, and the validation loop lets it self-correct until the output is valid.
js
import SIMPLEFFMPEG from "simple-ffmpegjs";// 1. Build the schema context for the AI
// Only expose the clip types you want the AI to work with.
// Developer-level config (codecs, resolution, etc.) stays out of the schema.
const schema = SIMPLEFFMPEG.getSchema({
include: ["video", "image", "text", "music"],
instructions: [
"You are composing a short-form video for TikTok.",
"Keep total duration under 30 seconds.",
"Return ONLY valid JSON — an array of clip objects.",
],
moduleInstructions: {
video: "Use fade transitions between clips. Keep each clip 3-6 seconds.",
text: [
"Add a title in the first 2 seconds with fontSize 72.",
"Use white text with a black border for readability.",
],
music: "Always include looping background music at volume 0.15.",
},
});
// 2. Send the schema + prompt to your LLM
async function askAI(systemPrompt, userPrompt) {
// Replace with your LLM provider (OpenAI, Anthropic, etc.)
const response = await llm.chat({
messages: [
{ role: "system", content: systemPrompt },
{ role: "user", content: userPrompt },
],
});
return JSON.parse(response.content);
}
// 3. Generate → Validate → Retry loop
async function generateVideo(userPrompt, media) {
// Build the system prompt with schema + available media and their details.
// Descriptions and durations help the AI make good creative decisions —
// ordering clips logically, setting accurate position/end times, etc.
const mediaList = media
.map((m) =>
- ${m.file} (${m.duration}s) — ${m.description})
.join("\n"); const systemPrompt = [
"You are a video editor. Given the user's request and the available media,",
"produce a clips array that follows this schema:\n",
schema,
"\nAvailable media (use these exact file paths):",
mediaList,
].join("\n");
const knownPaths = media.map((m) => m.file);
// First attempt
let clips = await askAI(systemPrompt, userPrompt);
let result = SIMPLEFFMPEG.validate(clips, { skipFileChecks: true });
let attempts = 1;
// Self-correction loop: feed structured errors back to the AI
while (!result.valid && attempts < 3) {
const errorFeedback = result.errors
.map((e) =>
[${e.code}] ${e.path}: ${e.message})
.join("\n"); clips = await askAI(
systemPrompt,
[
Your previous output had validation errors:\n${errorFeedback},
\nOriginal request: ${userPrompt},
"\nPlease fix the errors and return the corrected clips array.",
].join("\n"),
); result = SIMPLEFFMPEG.validate(clips, { skipFileChecks: true });
attempts++;
}
if (!result.valid) {
throw new Error(
Failed to generate valid config after ${attempts} attempts:\n +
SIMPLEFFMPEG.formatValidationResult(result),
);
} // 4. Verify the AI only used known media paths
// The structural loop (skipFileChecks: true) can't catch hallucinated paths.
// You could also put this inside the retry loop to let the AI self-correct
// bad paths — just append the unknown paths to the error feedback string.
const usedPaths = clips.filter((c) => c.url).map((c) => c.url);
const unknownPaths = usedPaths.filter((p) => !knownPaths.includes(p));
if (unknownPaths.length > 0) {
throw new Error(
AI used unknown media paths: ${unknownPaths.join(", ")});
} // 5. Build and export
// load() will also throw MediaNotFoundError if any file is missing on disk.
const project = new SIMPLEFFMPEG({ preset: "tiktok" });
await project.load(clips);
return project.export({
outputPath: "./output.mp4",
onProgress: ({ percent }) => console.log(
Rendering: ${percent}%),
});
}// Usage
await generateVideo("Make a hype travel montage with upbeat text overlays", [
{
file: "clips/beach-drone.mp4",
duration: 4,
description:
"Aerial drone shot of a tropical beach with people playing volleyball",
},
{
file: "clips/city-timelapse.mp4",
duration: 8,
description: "Timelapse of a city skyline transitioning from day to night",
},
{
file: "clips/sunset.mp4",
duration: 6,
description: "Golden hour sunset over the ocean with gentle waves",
},
{
file: "music/upbeat-track.mp3",
duration: 120,
description:
"Upbeat electronic track with a strong beat, good for montages",
},
]);
`The key parts of this pattern:
1.
gives the AI a precise specification of what it can produce, with only the clip types you've chosen to expose.
2. instructions / moduleInstructions embed your creative constraints directly into the spec — the AI treats them the same as built-in rules.
3. Media descriptions with durations and content details give the AI enough context to make good creative decisions — ordering clips logically, setting accurate timings, and choosing the right media for each part of the video.
4. validate() with skipFileChecks: true checks structural correctness in the retry loop — types, timelines, required fields — without touching the filesystem.
5. The retry loop lets the AI self-correct. Most validation failures resolve in one retry.
6. The path guard catches hallucinated file paths before load() hits the filesystem. You can optionally move this check inside the retry loop to let the AI self-correct bad paths. load() itself will also throw MediaNotFoundError if a file is missing on disk.Testing
$3
The library includes comprehensive unit and integration tests using Vitest:
`bash
Run all tests
npm testRun unit tests only
npm run test:unitRun integration tests only
npm run test:integrationRun with watch mode
npm run test:watch
`$3
For visual verification, run the demo suite to generate sample videos covering all major features. Each demo outputs to its own subfolder under
and includes annotated expected timelines so you know exactly what to look for:`bash
Run all demos (timeline, transitions, text, Ken Burns, audio, watermarks, karaoke, torture test)
node examples/run-examples.jsRun a specific demo by name (partial match)
node examples/run-examples.js transitions
node examples/run-examples.js torture ken
`Available demo scripts (can also be run individually):
| Script | What it tests |
| --- | --- |
                                  |
| Leading/middle/trailing gaps, custom fill colors, fillGaps: true shorthand |
| demo-transitions.js | Fade, wipe, slide, dissolve, fadeblack/white, short/long durations, image transitions |
| demo-text-and-animations.js | Positioning, fade, pop, pop-bounce, typewriter, scale-in, pulse, styling, word-replace |
| demo-ken-burns.js | All 6 presets, smart anchors, custom diagonal, slideshow with transitions |
| demo-audio-mixing.js | Volume levels, background music, standalone audio, loop, multi-source mix |
| demo-watermarks.js | Text/image watermarks, all positions, timed appearance, styled over transitions |
| demo-karaoke-and-subtitles.js | Smooth/instant karaoke, word timestamps, multiline, SRT, VTT, mixed text+karaoke |
| demo-torture-test.js | Kitchen sink, many clips+gaps+transitions, 6 simultaneous text animations, edge cases |Each script header contains a
WHAT TO CHECK section describing the expected visual output at every timestamp, making it easy to spot regressions.Contributing
Contributions are welcome. Please open an issue to discuss significant changes before submitting a pull request.
1. Fork the repository
2. Create a feature branch (
git checkout -b feature/my-feature)
3. Write tests for new functionality
4. Ensure all tests pass (npm test)
5. Submit a pull requestCredits
Inspired by ezffmpeg by John Chen.
License
MIT
``