functional testing harness for casperjs
npm install spookfunctional testing harness using casperjs.
Tests are run via casperjs on phantomjs and slimerjs
``
[sudo] npm -g install spook
Global deps:
`
[sudo] npm -g install slimerjs@0.9.2 casperjs phantomjssee https://github.com/laurentj/slimerjs/issues/301
If you want to run the spook server and generate thumbnails for screenshots, also install graphicsmagick. You can do this on osx via Homebrew
`
brew install graphicsmagick
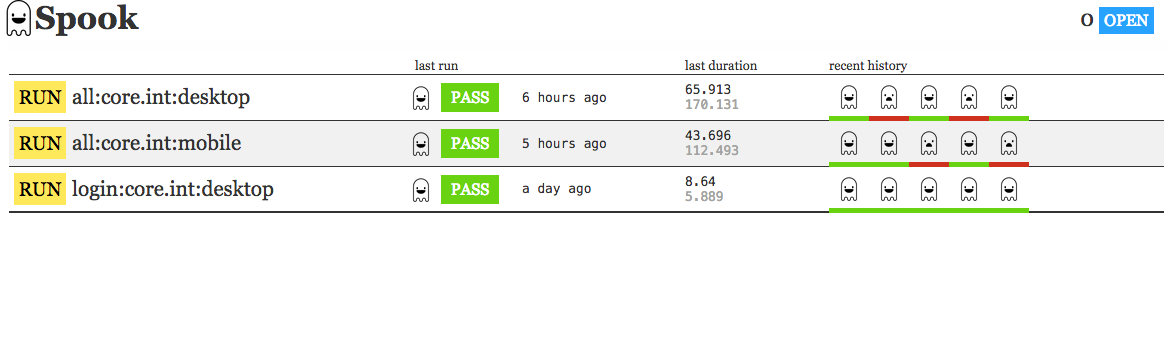
##### configured jobs
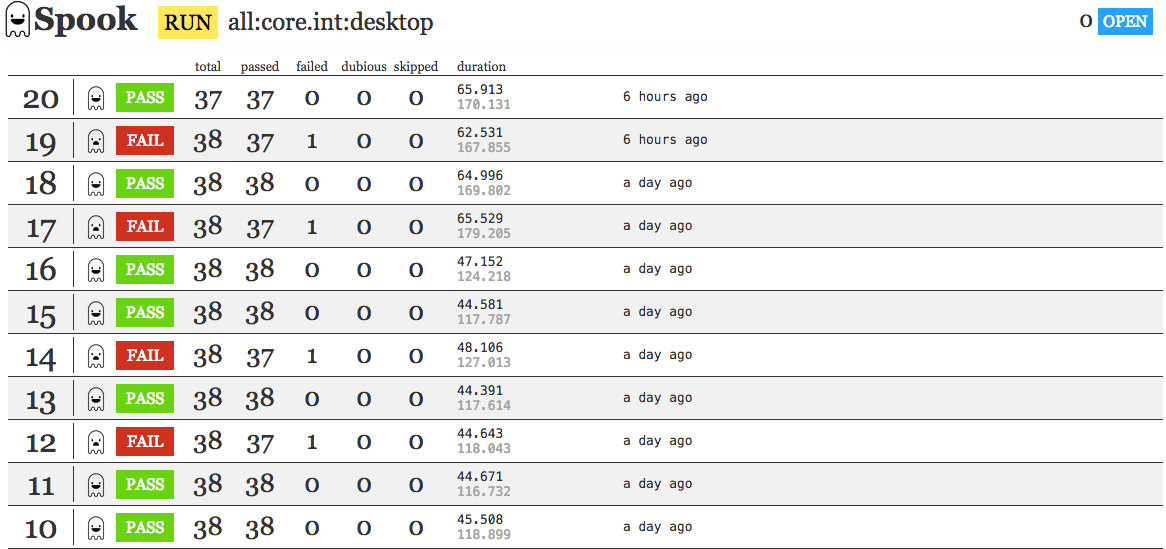
##### job runs
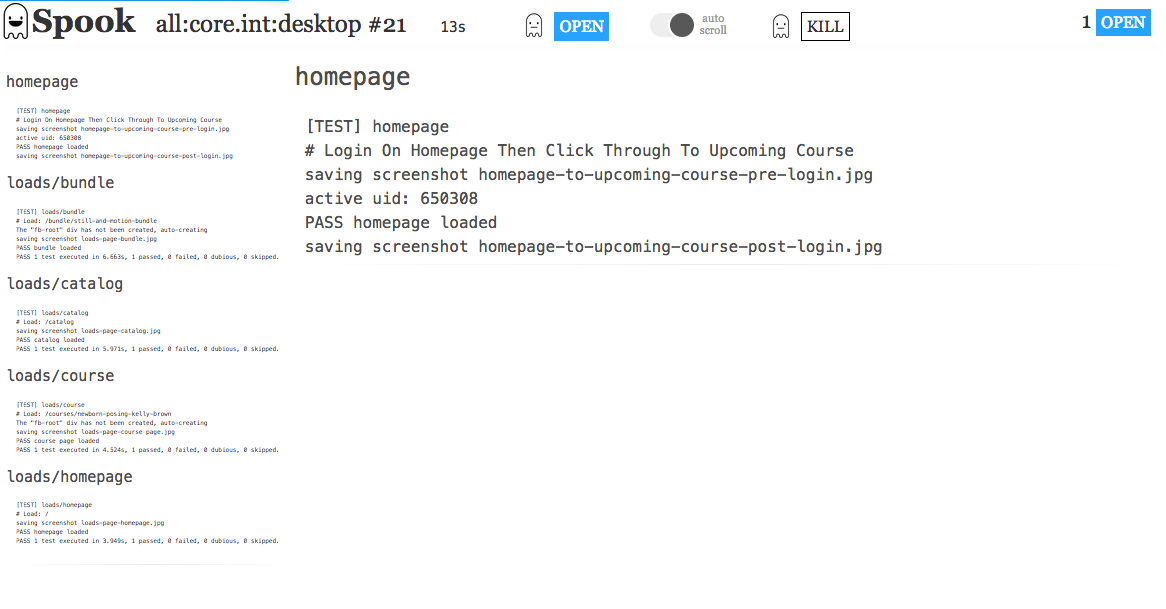
##### raw run output
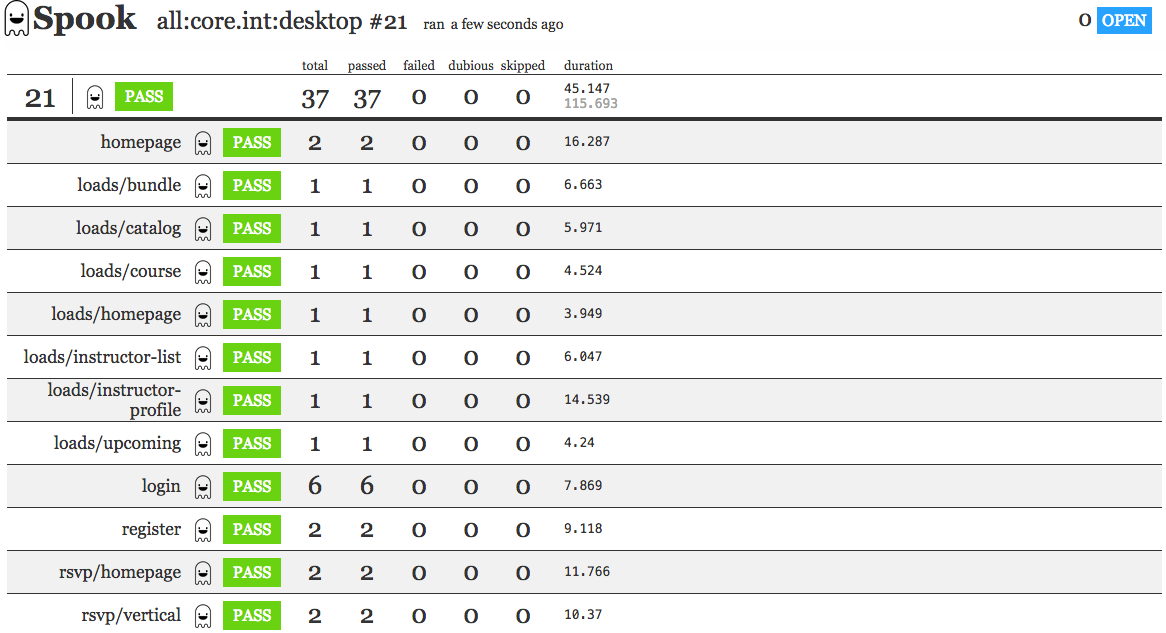
##### run results
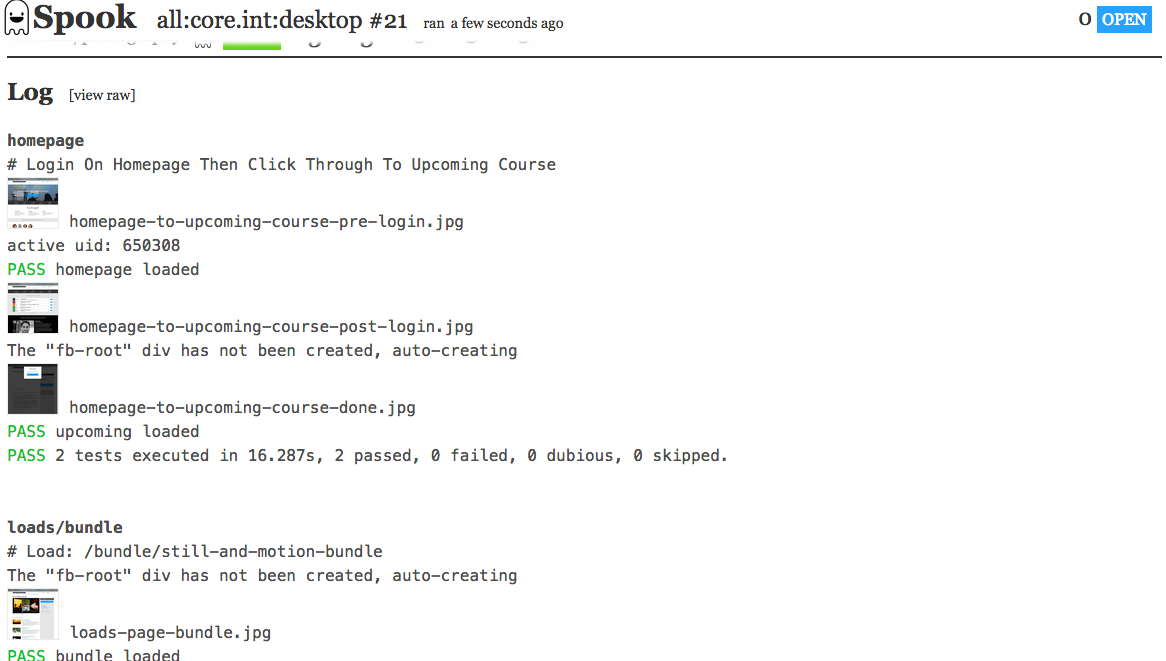
##### formatted log output
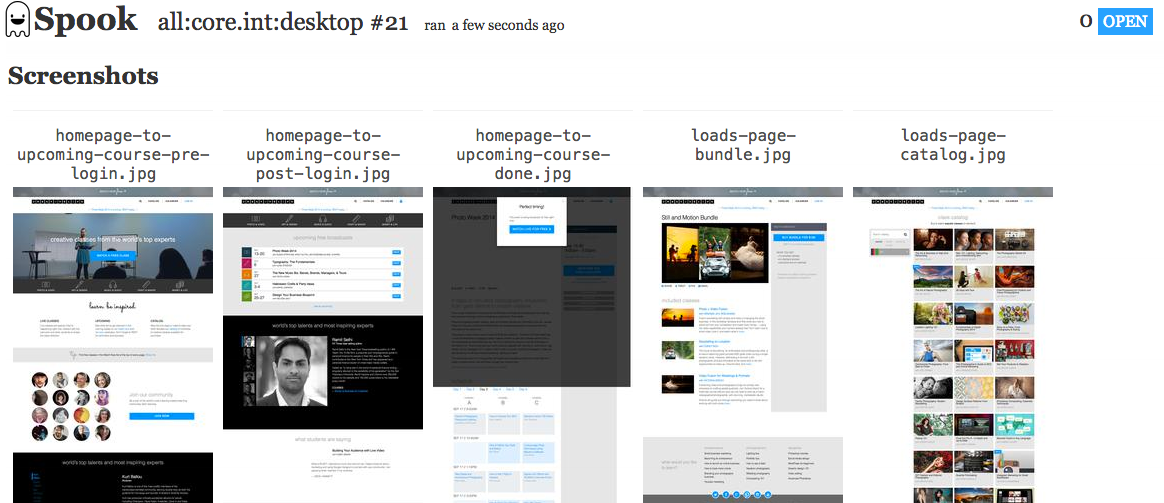
##### screenshot thumbnails
- parallel execution of casperjs tests
- automatic inclusion of include files (extending this approach)
- optional recording of results with server interface to run tests and browse results
A typical spook command (run from the root of this cloned repo) might look like this:
`
spook --out run --tests '{homepage,loads/{bundle,catalog}.js}' --base tests/www --includes 'includes/{common,www}/*.js' -- --env=production --verbose --engine=slimerjs
Let's break that down:
- spook the spook executable--out
- the relative directory to output any screenshots--tests
- a glob pattern of what tests to run, this pattern should be in quotes to prevent shell variable expansion--includes
- a glob pattern of what files to invlude before tests are run, this pattern should be in quotes to prevent shell variable expansion--base
- a local directory path to where the actual tests are (makes --test simpler to write and removes this path prefix from results)--
- signifies the end of arguments/options sent to spook, all values after this are sent to casperjs directly--env=production
- passing an option called env to casperjs cli--verbose
- putting casperjs into verbose mode (recommended)--engine=slimerjs
- telling casperjs to run tests in gecko/firefox.
By default on the command line spook runs tests in series. You can have it run tests in parallel using:`
--work parallel
Note that stdout will have multiple test output at the same time, but will show a summary at the end. By default spook runs 3 tests at once. You can up this limit with`
--parallel-limit 5
To save a test job and be able to run it from the web interface, add --add 'name of job' to the command:
``
spook --add 'example job' --out run --tests '{homepage,loads/{bundle,catalog}.js}' --base tests/www --includes 'includes/{common,www}/*.js' -- --env=production --verbose --engine=slimerjs
You can then start a spook server to run/view tests, via
`
spook --server
To have spook automatically parse screen shots and save assets to the right location, add this function to one of your include files (spook parses logout for the string "saving screenshot"). We're overriding the default casper.capture, but you could create a new function. You then create a screenshot with casper.capture('name-without-extension'). Spook populates the casper.cli.options.output value based on the --out argument passed to it.
`
casper._capture = casper.capture;
casper.capture = function capture(targetFilepath, clipRect, opts) {
  opts = opts || {};
  opts.format = opts.format || 'jpg';
  opts.quality = opts.quality || 75;
  console.log('saving screenshot ' + targetFilepath + '.' + opts.format);
  casper._capture(casper.cli.options.output + '/' + targetFilepath + '.' + opts.format, clipRect, opts);
};
Spook uses socket.io to send progress of runs to the browser. The list of run jobs don't have any automatic refreshing built in yet, but you can pass ?refresh=X` where X is a number in seconds which will make spook reload any page via a meta tag.
---
Spook logos designed by Julien Deveaux from the Noun Project :: Creative Commons – Attribution (CC BY 3.0)